IntellectTM
IMPORTANT PROGRAM MODIFICATIONS

The following Release Notes include the features and modifications made in the current update. PCS suggests you provide each department a copy of the Release Notes so they are aware of the changes which may affect their department.
In order to be aware of ALL changes in the software, please read all release notes from the version you are currently on through to the version to which you are updating.
Update may include items labeled ATTENTION which will IMMEDIATELY affect Billing and other daily tasks. Please be sure to notify all departments which will be affected.
If you would like to update to the latest version, please click here for authorization forms and instructions.
Release Date: June 11, 2020
Charges
FIX Charges --► Modify <Description> & <Code>
The <Description> and <Code> columns are now read-only and users are not able to click on columns to make modifications.
Payment
MODIFICATION Payment --► Open Item <Comment>
The <Comment> column was increased from 40 to 80 characters.
Schedule
MODIFICATION Schedule --►Appointment --►Full Day --►Day Tab, Week Tab, Month Tab & Appointment List Tab -- Right-Click Menu / Telemedicine -- Schedule an Appointment tab
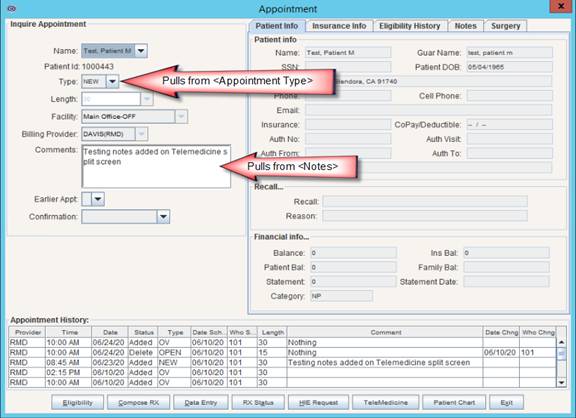
As of this update, when the provider joins the Telemedicine video session, the split screen displays a new tab for Schedule an Appointment. This tab allows the provider to schedule the patient’s next appointment while connected to the video session. NOTE: Access to this tab is disabled after the Visit Note is submitted.
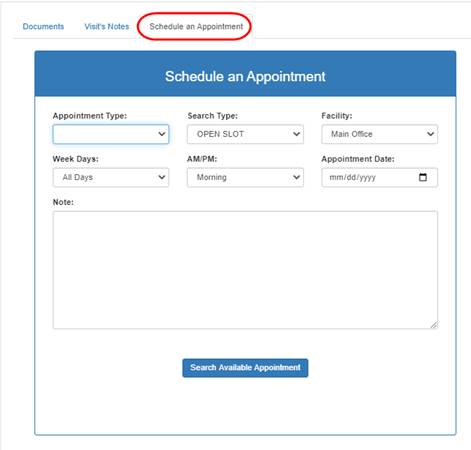
The provider sets the search criteria to check availability on their schedule by leaving the default values or clicking on the boxes to change the selection.
• <Appointment Type>: The drop-down displays, in alphabetical order, the Utility --► Set Up --► Appointment --► Appointment Type <Description> for all Appointment Types where <Expired> is ‘No’. Select the Appointment Type you wish to schedule for the patient’s next visit.
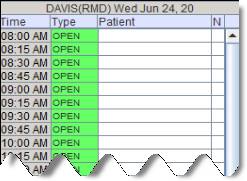
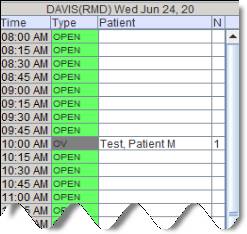
• <Search Type>: The drop-down displays, in alphabetical order, the Utility --► Set Up --► Appointment --► Appointment Type <Self Sched Description> for all Appointment Types where the field is NOT blank. Select the description associated with the Appointment Type displayed on the Schedule --► Appointment --► Full Day screen when an appointment is NOT scheduled in the time slot.
For example, the <Type> column may display ‘OPEN’, ‘LUNCH’, ‘CLOSED’, or a specific appointment type such as ‘NP’ for new patient appointments before an appointment is added to the time slot.
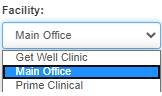
• <Facility>: The drop-down displays, in alphabetical order, the Utility --► Facility <Name> for all Facility Codes where the <Webstaff> is set to ‘Y’. Select the facility associated with the <Place of Service> field on the Utility --► Set Up --►Appointment --► Template screen.
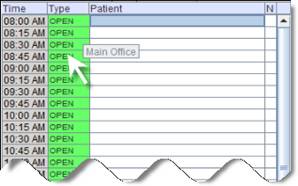
NOTE: Hovering the cursor over the <Type> column on the Schedule --► Appointment --► Full Day screen displays the Facility Name associated with the time slot on the Template.
• <Week Days>: Leave the default ‘All Days’ or make a selection for a specific day of the week.
• <AM/PM>: Leave the default or make a selection from the drop down list.
• <Appointment Date>: Select a starting date for the search by either typing the date formatted as MM/DD/YYYY or clicking the ![]() icon to open the calendar. For example, if the patient is due for a follow up in 6 weeks, use the calendar to select the date for 6 weeks from today’s date.
icon to open the calendar. For example, if the patient is due for a follow up in 6 weeks, use the calendar to select the date for 6 weeks from today’s date.
The calendar opens with the blue box on today’s date. Click on a date to make a selection or use the following to move the focus of the calendar:
~ Click the down arrow next to the month/year to display the year/month selection window.
~ Click ![]() to move to the previous month or
to move to the previous month or![]() to move to the next month.
to move to the next month.
~ Click ![]() to return the selection to today’s date.
to return the selection to today’s date.
• <Note>: Type notes to appear in the appointment <Comment> field, if needed.
Clicking [Search Available Appointment] displays the following:
• Click [Search again] to return to the previous screen and enter new search criteria.
-OR-
• Click <Choose Available Dates> to display the dates where this provider has available time slots.
After clicking the date, all available times are displayed:
• Click drop-down for <Choose Available Dates> to select another date.
-OR-
• Click [Search again] to enter new search criteria.
-OR-
• Click the time to schedule the appointment and wait for the confirmation message to appear.
NOTE: The appointment is automatically added to the Full Day Schedule in Intellect for the same Provider as the Telemedicine video session and the <Appointment Type> entered with the search criteria.
MODIFICATION Schedule --►Appointment --►Full Day --►Day Tab, Week Tab, Month Tab & Appointment List Tab -- Right-Click Menu / Telemedicine -- Visit's Notes tab
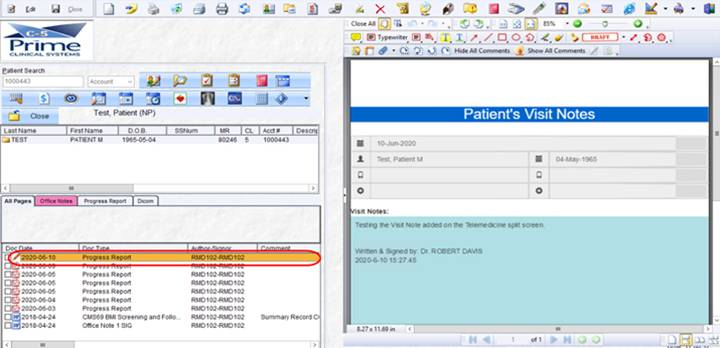
For PCM providers only, previous versions only added ‘Written and Signed by Dr’ with the provider name when Visit Notes were submitted and filed with the PDF document in the patient’s chart. The following changes were made to meet CMS requirements for authenticated electronic signatures on medical records:
• A date and time stamp is added to the document after [Submit] is selected.
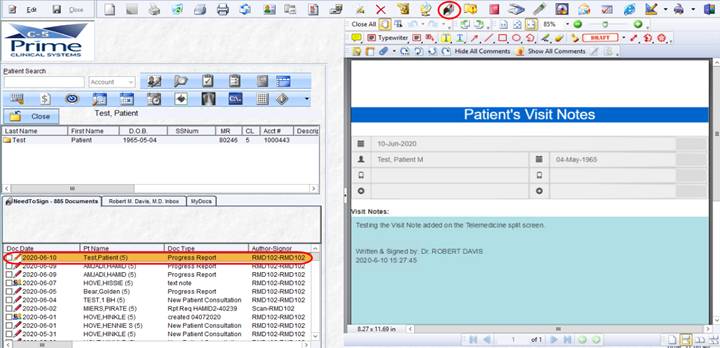
• The PDF document filed in the patient’s chart is sent to the appointment provider’s inbox for signature.
Document displayed in patient’s chart:
Document displayed in appointment provider’s inbox:
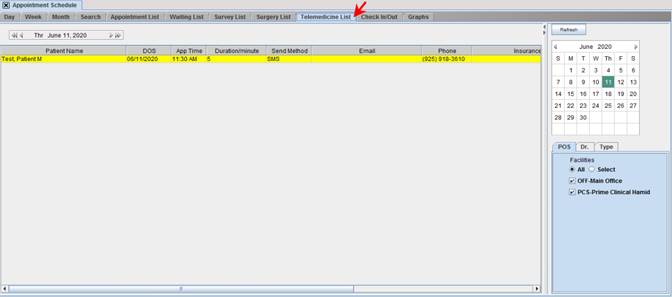
NEW FEATURE Schedule --►Appointment --►Full Day – Telemedicine List tab
This release includes the Telemedicine List tab for tracking appointments where a video chat session was completed between the patient and the appointment provider using the Telemedicine feature. NOTE: Scheduled appointments are displayed only AFTER the video session has ended.
To view the list of Telemedicine video chat sessions completed for a specific appointment date, go to Schedule --► Appointment --►Full Day and click on the Telemedicine List tab.
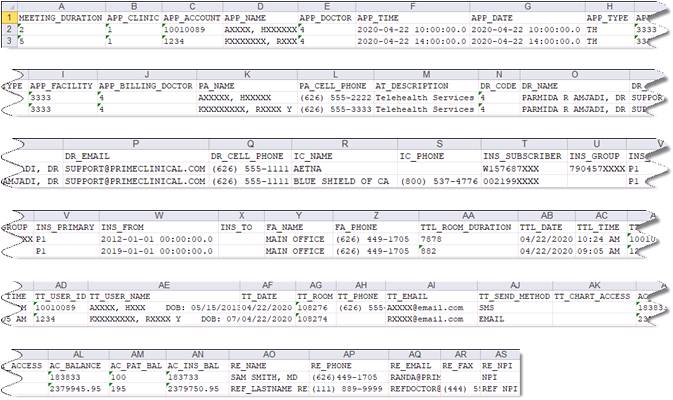
The right-click context menu option for {Export} generates a report with additional details for the completed Telemedicine appointments.
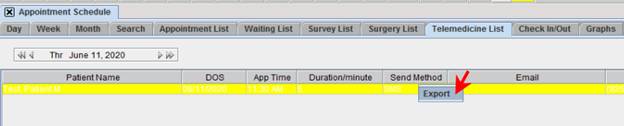
See Telemedicine List documentation for a complete column review of the report exported to Excel.
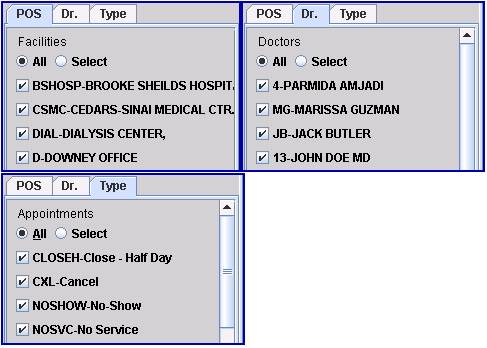
The Calendar displayed on the right (see below) works the same as it does under the Day tab.

The POS, Dr., and Type tabs in this option work similarly to the Day tab, but have one difference. Under the Day view, when you select to display only specific Facilities or Types, the program displays the slots depending upon the Utility --►Set Up --►Appointment --►Template. Whereas, in the Telemedicine List tab, the selection filters the list of completed video chart sessions based on the scheduled appointment Facility or Type.