
Intellect™
ADDITIONAL FEATURES

Patient Portal
Patient Access
You must have both PCM and Intellect to use this feature. For details on setting up and using Patient Portal, see PCM online documentation for Optional Modules; Chapter: Patient Portal; Document: Patient Portal Overview.
In this Topic Hide
1. Once Patient Portal is set up for an office, patients may be sent an email invitation with a link to the URL for a practice-specific portal website. When the patient clicks the link in the email invitation, a Create New Account page is displayed in their web browser.
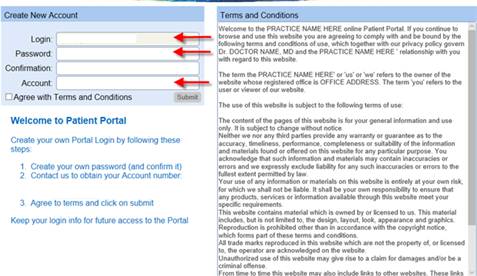
1.1 <Login> must be set to the same email address to which the invitation was sent.
1.2 <Password> is created by the patient and re-entered in the <Confirmation> field.
1.3 For security purposes, the patient must enter their <Account> number.
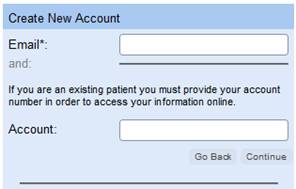
2. Alternately, if the patient enters the URL for the portal login page, the [Create New Account] button opens the Create New Account screen with a prompt to Select User Type.

2.1 After selecting {as a Patient}, the patient is prompted to enter their <Email> and <Account> number.
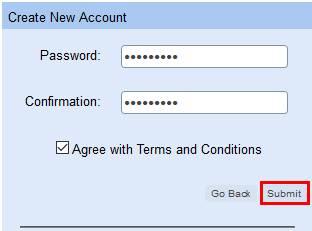
2.2 Next, the patient must set the password.
3. For more details, see PCM documentation for Optional Modules; Chapter: Patient Portal; Section: Patient Interface; Document: Patient Interface Overview, II - Patient Portal Login
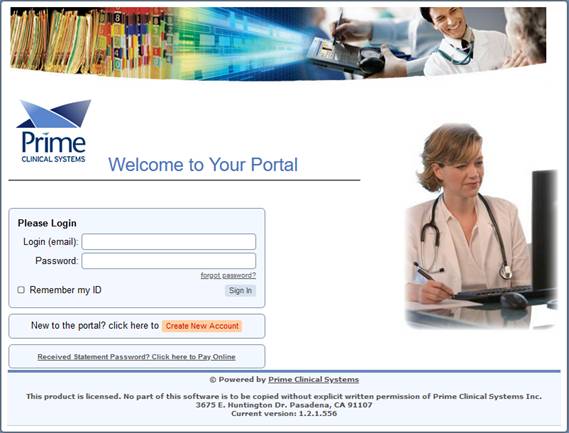
Several actions can be taken via the 'Welcome to Your Portal' screen.
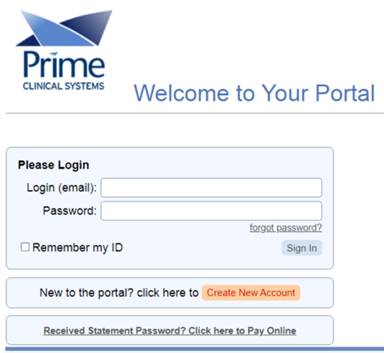
Effective Patient Portal version 1.2.1.551, ‘To Pay Online enter your password’ was changed to ‘Received Statement Password? Click here to Pay Online’.
A - Options Enabled by the Clinic
1. From the ‘Welcome to Your Portal’ screen, the patient may log into their portal account, if already created.
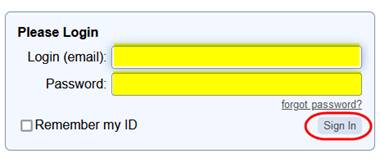
1.1 Populate the <Login (email)> and <Password> fields.
1.2 Click ![]() button.
button.
2. The available Options displayed on the left vary based on clinic setup. Two options require additional setup in Intellect.
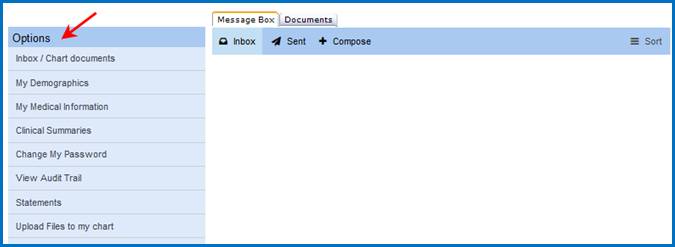
2.1 {Statements}: Allows patients to view statements and make payments, see B - Making Payments Online below for more details.
2.2 {Schedule My Appointment}: This option is only displayed if patient self-scheduling is enabled. See Additional Features --► Patient Portal --► Appointments in this documentation for details.
3. For details on each of the Options as well as the Message Box and Documents tabs, see PCM online documentation for Optional Modules; Chapter: Patient Portal; Section: Patient Interface; Document; Patient Interface Overview, IV - Available Options.
1. There are two methods for making credit card payments through Patient Portal:
1.1 Patients may use the password on their statement for accessing the payment page even if they do not have an active portal account (see B-2 below for details).
1.2 Patients may log into their portal account and then select the {Statements} option. (See B-3 below for details.)
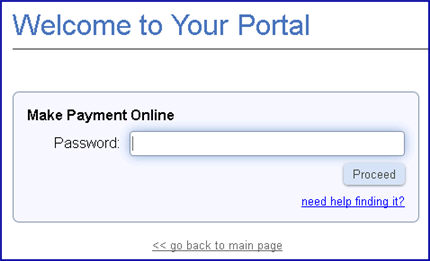
2. To pay using password included on the Patient Statement:
2.1 Click ![]() on the 'Welcome to Your Portal' screen.
on the 'Welcome to Your Portal' screen.
2.1.1 Effective Patient Portal version 1.2.1.551, ‘To Pay Online enter your password’ was changed to ‘Received Statement Password? Click here to Pay Online’.
2.2 Enter the account number and password listed on the Patient Statement, and then click [LOGIN].
2.2.1 Newer versions of Patient Portal may display the same login screen as the Intellect Online Payment Portal. For details on making payments and viewing statements, see Additional Features --► Online Payment Portal, 8. Online Payment Portal Screen Overview and Use.
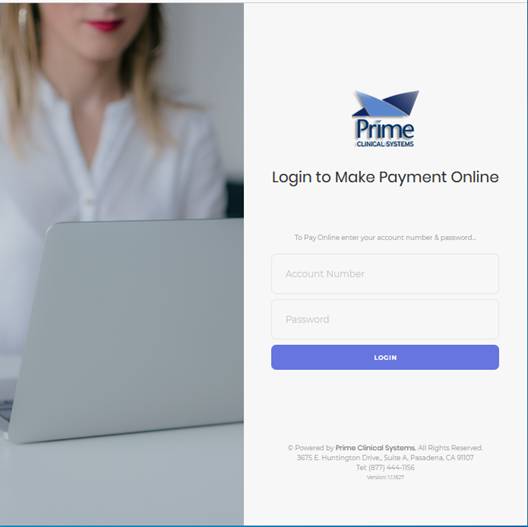
2.2.2 Prior versions of Patient Portal prompted password entry only which may have resulted in accessing the wrong account if the same password was used for another account several months earlier. If the screen below is displayed, contact Prime Clinical Systems support to request an update.
3. To view/pay Statements via Patient Portal account:
3.1 Patient must sign into their portal account.

3.2 Click {Statements} option to display all statements.
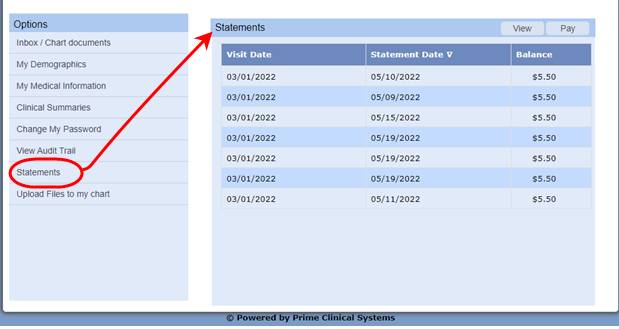
3.2.1 Click [View] to display detailed activity and balance.
3.2.2 Click [Pay] to display Payment Information page.
3.3 The patient completes ALL fields on the Payment Information page.
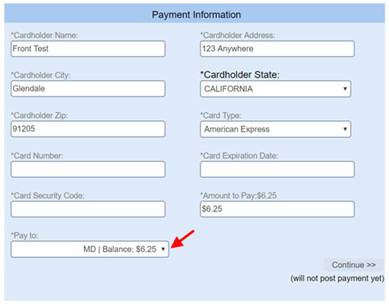
3.3.1 Effective version 19.03.26, the <Pay to> drop-down allows the patient to specify which provider balance to pay, if more than one provider.
3.3.2 Click [Continue >>] to process the payment.
4. IMPORTANT NOTES:
4.1 Patient Portal version 1.2.1.551 or greater supports online payments. Contact Prime Clinical Systems support to request update to the latest Patient Portal release, if needed.
4.2 Each clinic must have an active account with Authorize.net to enable processing credit card payments through Patient Portal. For more information on setting up an Authorize.net account, see Third-Party Vendor Options, Credit Card Authorization.
4.3 When the patient completes the payment screen, the credit card payment is processed but not posted to the patient’s account balance. The payments must be posted through the Payment --► Open Item screen.
4.3.1 NOTE: The Payment --► Apply Receipt screen does not allow posting receipts based on operator number, so it will apply credit card payments collected through the Online Payment Portal AND payments entered on the Add Receipt screen in Intellect.
4.4 In Intellect, the Schedule --►Appointment --►Receipt --►Print Report Receipt option is the only report that tracks the credit card payments collected via Patient Portal (operator number 50000) for the specified entry date. Offices should also be able to run daily closing reports through Authorize.net.
1. The Documents by Topic section on the 'Welcome to Your Portal' allows access to documents or websites by anyone without a portal login.
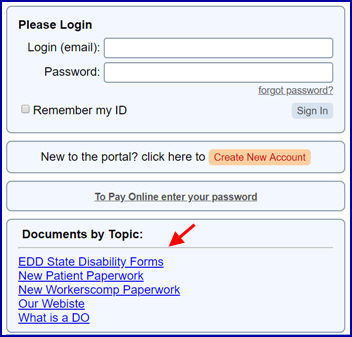
2. When the patient clicks on a link, the document or website opens in the web browser.
3. For details on setting up documents and/or websites on the on the 'Welcome to Your Portal' page, see PCM online documentation for Optional Modules; Chapter: Patient Portal; Section: Patient Portal Administrator; Subsection: General Set Up; Document: Shared Content.