Intellect™
REGISTRATION MENU OPTIONS

Worker
Add/Modify PR2, PR3, Pr4
PR3 Search
This option is used to search for, view, and print one or the entire batch of patient PR 3 forms returned from the search.
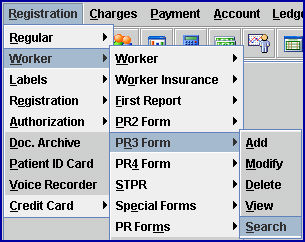
1. To search for and print PR-3's in Intellect, go to Registration --► Worker --►PR-3 Form --► Search

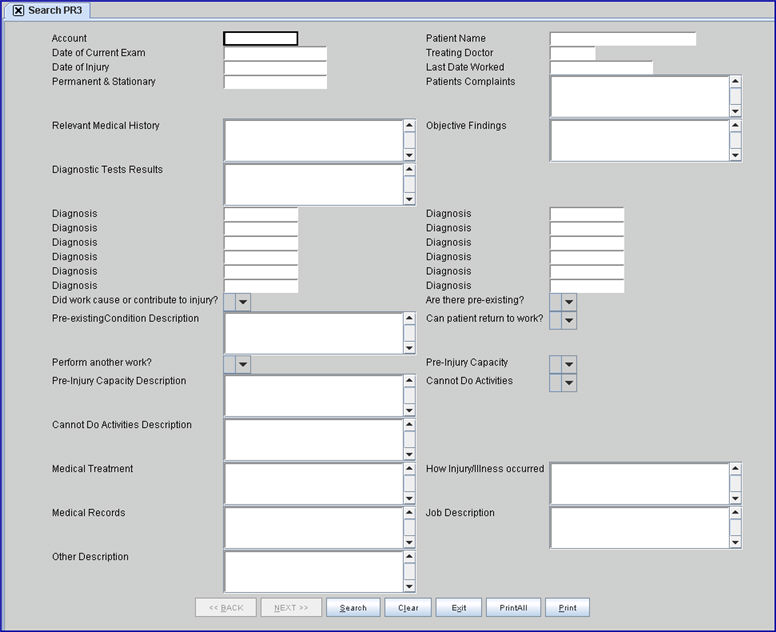
The Search PR-3 screen displays:

Effective version 16.02.22, these fields were removed from the PR3 screen as they are no longer needed for DWC Form PR-3 (Rev. 10/2015): <Apportionment>, <Physician 1>, <Physician 2>, <Physician 3>, <Personal Records>, and the three <Specialty> fields.
2. The <Patient Account No> field may default the most recent patient account number used. Accept this account OR use the [Space Bar] or the [Delete] key to clear the field. Enter a new number to use in the search OR leave this field blank and use other criteria.
3. Complete any one or combination of fields to use as search parameters. In other words, to search for PR3s for patients with the same doctor, enter the doctor's name in the <Doctor> field.
4. Select the [Search] button from the bottom of the screen.

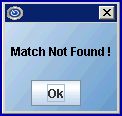
4.1 If the search criteria does not match a PR-3 record, Intellect displays:

Press [Ok] to display a Searching screen where any one or combination of new search parameters may be entered at the bottom of the screen; e.g., <Patient Account No>, <Date of Exam>, <Injury Date>, <Diagnosis 1>, <Sequence>, <Diagnosis 2>, and <Diagnosis 3>.
Press
[Enter] all the way through the fields to begin the search. Alternately, enter search criteria and then press [F2]. For additional information on using Searching screens, see Introduction to Intellect --►Intellect Characteristics and Features, Searching Screen.
4.2 If matching PR-3(s) are found, Intellect displays those records.

4.3 To select a record from the list, either highlight the record OR press the [Enter] key, OR double-click on the record.
5. When the search is finished, select one of these options:

5.1 [Back]: Click to change the displayed PR to the previous record, if any.
5.2 [Next]: If more than one record is returned in the search, select one record to display completed fields and enable this button. Click [Next] to change the active record (the displayed record).
5.3 [Clear]: Click to clear all information and return the focus to the <Patient Account No> field without saving.
5.4 [Exit]: Click to clear the screen and return the focus to the main Intellect screen.
5.5 [PrintAll]: Click to print all returned records.
5.6 [Print]: Click to print the active record.