
Intellect™
SCHEDULE MENU OPTIONS

Appointment
Full Day
Tab Options
Search Tab
The Search feature is used to limit the information displayed in the appointment schedule area. For example, to work with only a single provider and clinic facility, or when looking for a specific appointment type, as defined in the Template.
Selecting the Search tab presents a screen containing several selection frames. Initially, the schedule area of the screen is blank until the selection frames are either set with the search criteria, or the defaults are accepted and the [GO] button is clicked to activate the search.
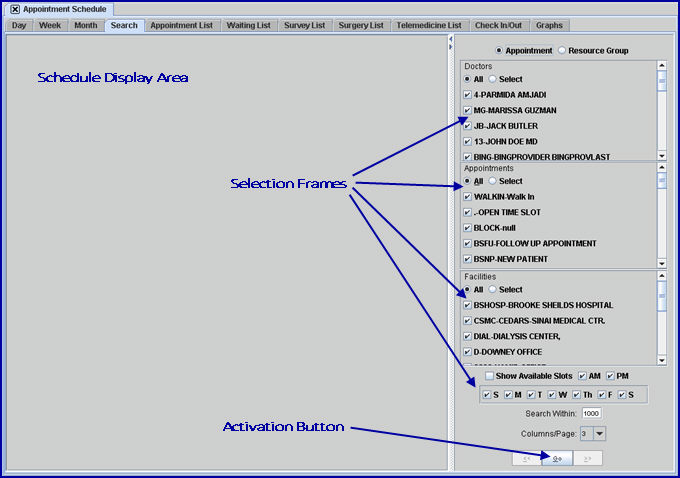
Intellect displays appointment columns in Day, Week, and Month views. The display starts with the current calendar day moving forward, but is based on search criteria entered or configured in a second frame. The default starts with all appointments for all providers selected in all facilities for all days, both a.m. and p.m., displayed three columns at a time. The view and search criteria may be adjusted.
View after a Search
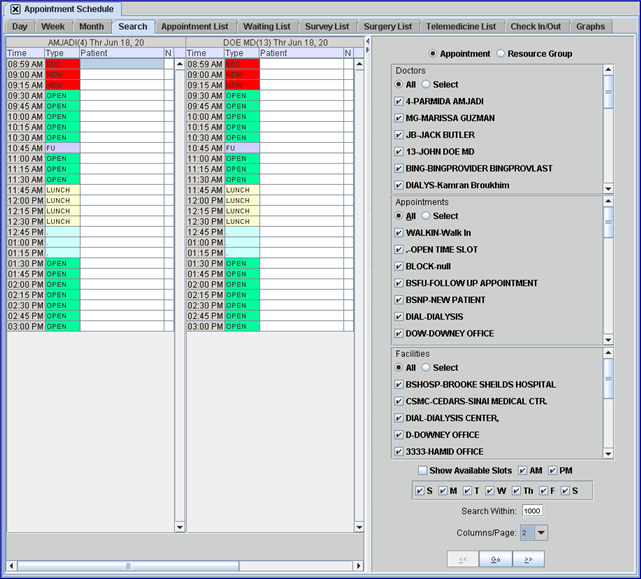
As can be seen above, the default screen includes
• The schedule search parameters frame
NOTE: To temporarily remove the schedule search parameters frame from the screen so only the provider column listings show, click on the divider's right arrow (see red arrow below). To restore the schedule search parameters frame, click on the divider's left arrow (see green arrow below):
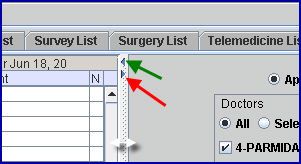
The location of the divider may also be adjusted by mouse-clicking anywhere on the divider to display a double-ended white arrow (see white arrow above), holding down the mouse left button, and then dragging the divider with the mouse to the desired location.

1. The providers’ available schedules may be viewed, depending on the various search criteria. The above example shows the columns in the Day tab view.
2. The amount of columns per frame is determined by the Columns/Page drop-down in the schedule search parameters frame (see red arrow below). Depending on the number of providers selected, the columns are scrollable so that all may be viewed.
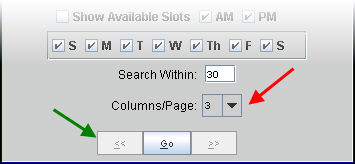
3. The display for these columns starts at the current calendar date and can be searched forward by the amount of columns per page using the arrow at the bottom of the next frame (see green arrow in example above).
3.1 The view may be moved forward and then back, but NEVER to a date that precedes the current calendar date.
4. The option to change the view by pressing [1], [2], or [3] on the top portion of the key board is also available. See Day tab view for detailed information.
5.1 The primary way to make additions or modification to the appointment schedule in the Search view is from the right-click/context menu pop-up.
5.2 To display the menu, click on the appropriate time slot within the patient column and then right click. For example:
5.2.1 Click on an empty time slot and select Add to display the Add Appointment screen.
5.2.2 Click on an existing patient appointment for other modification options.
5.3 See right-click (context) menu for detailed information.
- OR -
5.4 Instead of using the right-click menu, type 'A' in an empty time slot to add a patient, OR type 'M' in an existing patient appointment to make modifications.
The Schedule Search Parameters Frame
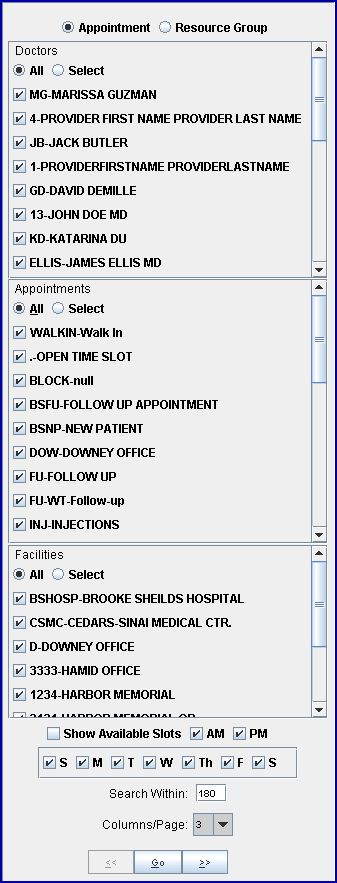
1.1 When the ![]() Appointment radio button is selected:
Appointment radio button is selected:

For each category; (e.g., Doctors, Appointments, Facilities), either click the ![]() All radio button to select everything in that category
All radio button to select everything in that category
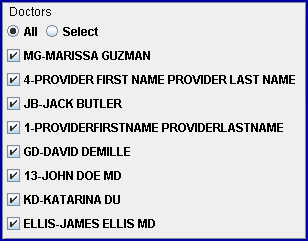
- OR -
click the ![]() Select radio button and then click individual check boxes
Select radio button and then click individual check boxes ![]() to choose individual options in that category.
to choose individual options in that category.
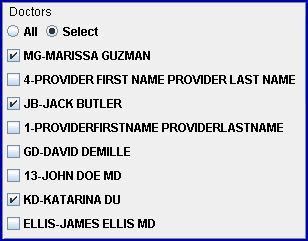
For each category, please note:
Doctor: Lists Provider names, including the Provider Code, as set up in Utility --►Provider --►Provider.
Appointments: Lists Appointment Types, including the Appointment Type Code, as set up in Utility --►Set Up --►Appointment --►Appointment Type.
Facilities: Lists facility names, including the Facility Code, as set up in Utility --►Facility.
2.1 When the ![]() Resource Group radio button is selected:
Resource Group radio button is selected:

The schedule shows available Resource Group appointment clusters based on the minimum/maximum relationship defined when creating the group in Utility --► Set Up --► Appointment --► Resource Group.
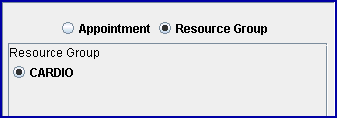
2.1.1 Select the radio button for the desired ![]() Resource Group.
Resource Group.
2.1.2 Click the [Go] button at the bottom of the frame.

3. Display Configuration Parameters
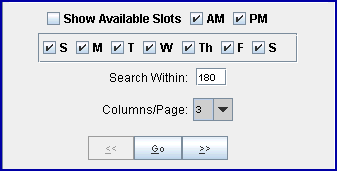
3.1 Show Available Slots: ![]() checking this option masks any appointment slot that can no longer accept appointments due to booking limitations. Blocks by definition are not available, however they are still visible.
checking this option masks any appointment slot that can no longer accept appointments due to booking limitations. Blocks by definition are not available, however they are still visible.
3.2 AM: This is selected by default. Display only morning appointments by deselecting ![]() PM.
PM.
3.3 PM: This is selected by default. Display only afternoon appointments by deselecting ![]() AM.
AM.
3.4 Days of the Week: The default is every day. Click individual boxes to deselect any undesired ![]() days.
days.
3.5 Search Within: Indicates how many days into the future to search. The default value is set in Utility --►Set Up --►Parameter <Appointment Lookup Days>. It may be modified here.
3.6 Columns/Page: This is used to determine how many columns to display at one time.
3.7 Advance Page Arrows: This moves the results ahead or back by the Columns/Page amount.
3.8 Go: Activate initial search. Returns the search to the first output display, or refreshes the Resource Group.