
Intellect™
SCHEDULE MENU OPTIONS

Recall
Add
This option is for scheduling and printing recall letters. Intellect has a library of letters. Options include advising the patient that it is time to schedule an appointment for the indicated care, notifying the patient his/her lab test was normal/abnormal, etc. Additional letters may be added, or existing letters modified, through Utility --► Messages --► Message.
See details on scheduling a recall letter.
Updates:
Effective version 20.02.17, for recall letters generated when the Utility --► Set Up --► Appointment --► Appointment Type <Recall> field is populated, the date is now set to the calendar date, NOT the appointment date.
Effective version 19.08.06, the Schedule --► Recall --► Modify option now tracks the date of modification and the user number associated with the modification. This information does not display on the screen.
Effective version 16.02.22, users may have a recall letter automatically sent when a particular diagnosis or procedure code is posted. For that type of recall letter, there is no set up required on the Add Recall screen; however, each diagnosis/procedure code for which a recall letter will be sent must be set up on the Utility --►Messages --► Message screen.
Effective version 9.12.24 New Option: Until this update, Recall letters could be automated based only on the date entered in the Recall table. Effective this update, automated Recall letters may be set up to print based on either the Date column in the Recall screen or the calendar date the record was added. If a clinic already has their recall letters set to print in automation, they should consider the following before making any changes:
• If a clinics Appointment Types are set up to insert records to the Recall screen based on the appointment schedule, or if the patient is a No Show.
Effective version 9.12.07 New field: Effective this update, a patient’s date of birth may now be printed on the Recall Letter/Form. To have this field added to your letters, please contact Prime Clinical Systems.
Note: The second address field on the Patient Registration screen is now available, if requested, to print on Recall letters. To have the second address added to your Recall letters, call our support department for assistance.
Videos Available: Click Recall Letter Setup and Appointment Recall to access the links. Depending on the system set up, the media player may need to be activated. Speakers need to be attached to the workstation to hear the instructions.
Note: To view the videos, log-in through the www.primeclinical.com website. Current support is required.
1. To schedule a Recall letter and message for a patient in Intellect, go to Schedule --► Recall --►Add:

The Add Recall screen opens:
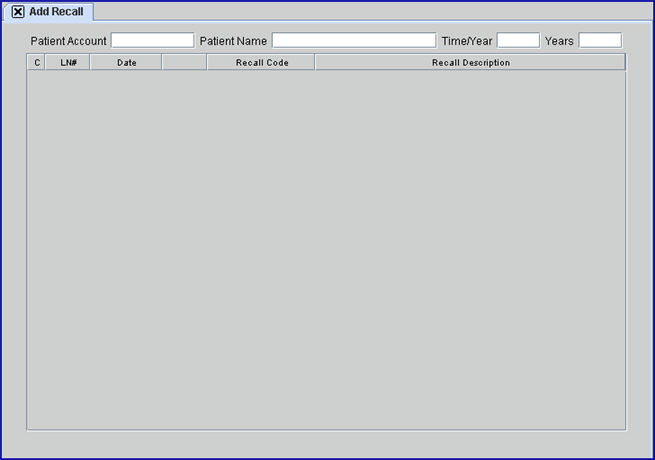
2. Patient Account 
2.1 Enter the account number of the patient.
- OR -
2.2 Type up to 6 characters of the last name and press the [F2] key. To select the account from the list, either highlight the record and press the [Enter] key, OR double-click on the record. If only part of the patient’s name is known, use a Wild Card search. Highlight the desired patient and press [Enter].
2.3 This is a required field. If [Enter] is pressed before this field is populated, an error message displays:
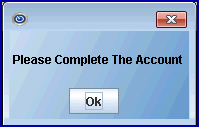
Press [Ok] to return to the <Patient Account> field.
3. Patient Name 
3.1 This field displays the patient name associated with the <Patient Account> entered above. It displays in 'Last, First' order.
3.2 This is a read-only field.
4.1 Type the number of times a year to generate recall notices for this patient.
4.2 The field is mandatory and must be completed. If left blank, an error message displays:

5. Years 
5.1 Type the number of years to continue generating recall notices for this patient.
5.2 The field is mandatory and must be completed. If left blank, an error message displays:
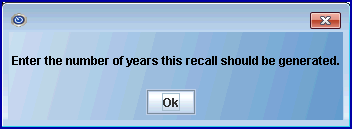
Press the [Enter] key to create a command line numbered 1, with the focus in the <Date> field:

6. C 
6.1 The Command column, although initially bypassed, can accept these commands:
6.1.1 Type 'A' (add) to return the focus to the <Time/Year> field, allowing a new Recall to be entered.
6.1.2 Type 'M' (modify) to allow modification of the line, sending the focus to the Date field.
6.1.2.1 The <Date> and <Recall Code> fields may be modified.
6.1.3 Type 'D' (delete) to display this box, allowing consecutive multi-line deletions.
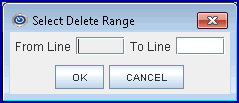
6.1.4 Press the [ESC] key to clear the entire screen.
7. LN# 
7.1 Line numbers are created sequentially by Intellect.
8. Date 
8.1 Type the date for the first recall letter to be processed. Intellect then uses the number from the <Time/Year> field to compute the dates for the recall.
9.1 Type the appropriate recall code for the patient. This entry is the same as the <Message Code> field for the actual letter in Utility --► Messages --► Message.
9.2 Create your own message, OR press the [F2] key twice to open the Searching REMARK screen to display the valid choices. For more information on Searching screens, see Introduction to Intellect --►Intellect Characteristics and Features -- Searching.
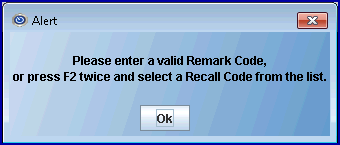
9.3 This field may not be left blank. If [Enter] is pressed before this field is populated, this message displays:
10. Recall Description 
10.1 The Recall Description is displayed.
10.2 This is a read-only field.
11. All entries are automatically saved and processed based on the <Date>, <Time/ Year>, and <Years> fields.