![]()
10. Schedule
Appointment/ Receipt
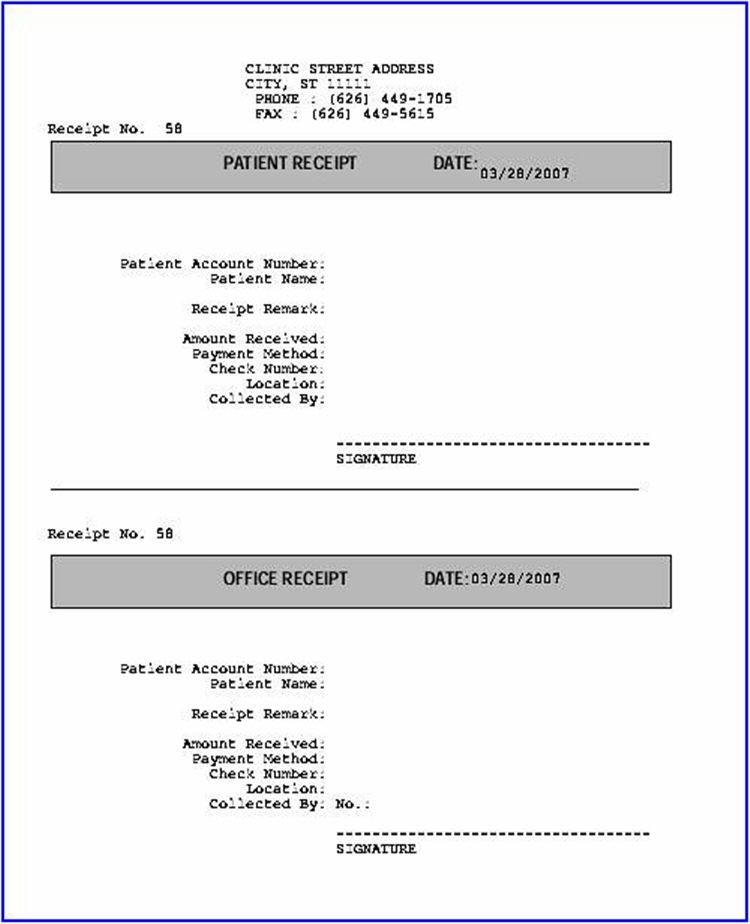
This option is used to create, record, and print patient payment receipts. With the default option <Print Receipt > accepted, Intellect prints a two part receipt: patient and office. Once created through this option, a report displaying a record of receipts may be viewed Schedule --► Appointment --► Receipt --►Print Report Receipt.
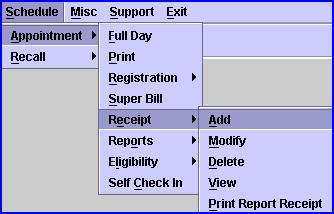
1. To add/print patient payment receipts in Intellect go Schedule --►Appointment --►Receipt --► Add
This brings the user to the Add RECEIPT screen.
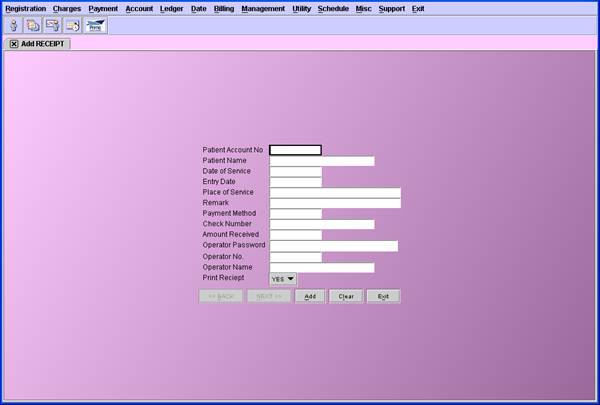
2. Patient Account No
![]()
2.1 Type the patient account number for whom the payment is to be recorded.
2.2 The field is mandatory and must be completed. If left blank the following error message will be displayed:
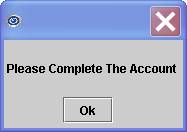
Clicking [OK] returns focus to <Patient Account No>.
2.3 Enter the account number, or type up to 6 characters of the last name and press the [F2] key. Select the account from the list by either highlighting the record or pressing the [Enter] key, or double clicking on the record.
3. Patient Name
![]()
3.1 The patient name will be displayed; Last, First.
3.2 This is a read only field and may not be accessed for modification of data.
4. Date of Service
![]()
4.1 Type the date of service to which this payment applies.
5. Entry Date
![]()
5.1 The current calendar date will be displayed. This is a read only field and may not be accessed for modification of data.
6. Place of Service
![]()
6.1 Optionally type the Facility <Facility Code>.
6.2 Enter the <Facility Code>, or type up to 6 characters of the description and press the [F2] key. Select the code from the list by either highlighting the record or pressing the [Enter] key, or double clicking on the record. Alternatively, after clearing the field: press the [F2] key twice to view the entire list of codes.
7. Remark
![]()
7.1 Optionally type any appropriate remark.
8.1 Optionally type the method of payment: Cash, Check, or Credit Card.
9. Check Number
![]()
9.1 Optionally type the check or card number.
10.1 Optionally type the amount received in decimal format.
11. Operator Password
![]()
11.1 Type a valid operator password. To complete the transaction this field is mandatory.
12. Operator No.
![]()
12.1 The Operator Number will be displayed. This is a read only field and may not be accessed for modification of data.
13. Operator Name
![]()
13.1 The Operator Name will be displayed. This is a read only field and may not be accessed for modification of data.
14. Print Receipt
![]()
![]()
14.1 Accept the default “Yes” print or use the drop down list to make an alternate selection.
15. Now that you have finished entering the information, you must select one of the following options:
![]()
15.1 When selecting [Add] if the <Operator Password> is not completed with a valid entry then Intellect will display this message:
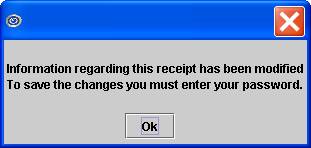
Click [OK] to return focus to <Operator Password>.
When complete the record will be saved and following printer dialog box will be displayed:
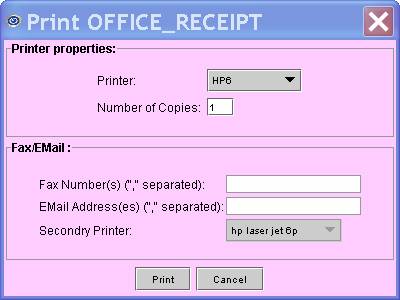
Printer: The default printer for the clinic and password you logged in as will be defaulted. To select a different printer view the list of printer codes by: either clicking on the arrow, OR press the → (right arrow) on your keyboard. In our example the Printer defaulted is HP6: this is just an example of a printer name and may not be set up on your system.
Select the printer type by clicking on the code, OR use the ↑ (up) and ↓ (down) arrows to highlight the correct code, then press the [Enter] key to select.
Number of Copies will default to either 0 (zero) or 1: both will print 1 copy. If you wish to print more than one copy: enter the number of copies.
Select the [Print] button to send your request to the printer.
Select the [Cancel] button to cancel printing, but save record.
15.2 Clicking [Clear] clears all information and returns focus to <Patient Account No> without saving.
15.3 Clicking [Exit] clears the screen and returns focus to the main Intellect screen without saving.
SAMPLE RECEIPT