Intellect™
UTILITY MENU OPTIONS

Set Up
Maintenance
Purge
Batch of Patient
and
UTILITY MENU OPTIONS
Maintenance
Purge
Batch of Patient
This option allows the permanent removal of selected information from patient accounts in Intellect. Comments, recalls, superbills, appointments, or entire patient records may be purged. This option can be used on an individual basis or in small batches.
1. To purge items or accounts in Intellect, go to Utility --► Maintenance --► Purge --► Batch of Patient:
The Print BOP_PURGE screen displays:
2.1 Accept the default 'LEDGER COMMENTS' OR use the drop-down list to make an alternate selection.
2.2 Click on the field, OR press the [F2] search key to display the valid choices:
3. Account 
3.1 Type the account number for which to perform the selected purge.
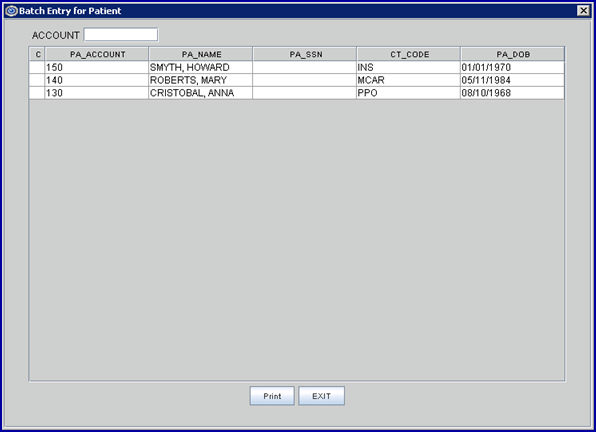
3.2 Press [Enter] to display the Batch Entry dialog screen to individually add more accounts to process as a single batch.
3.3 Type any additional account numbers (one at a time) and press [Enter] to add.
4. Through Date 
4.1 Enter the most recent entry date of activity (Ledger --► Accounting <Date> NOT <DOS>) to purge.
5. Save 
5.1 Use this field to allow the choice of whether or not to save the purged information in an archive directory.
5.2 Accept the default 'Yes' (save), OR use the drop-down list to make an alternate selection.

6.1 Use this field to allow the choice of whether or not to print a final hard copy record of patient's accounting ledgers for all purged patients.
6.2 Accept the default 'No' (do not print) OR use the drop-down list to make an alternate selection.

7. Demographic 
7.1 Use this field to allow the choice of whether or not to remove patient demographic information for all purged patients.
7.2 Accept the default 'Yes' (purge info) OR use the drop-down list to make an alternate selection.

8. Recalls 
8.1 Use this field to allow the choice of whether or not to remove appointment recall information for all purged patients.
8.2 Accept the default 'Yes' (delete recall history) OR use the drop-down list to make an alternate selection.

9. Ledger Comments 
9.1 Use this field to allow the choice of whether or not to remove ledger comments.
9.2 Accept the default 'Yes' (purge comments) OR use the drop-down list to make an alternate selection.

10. Charge 
10.1 Use this field to allow the choice of whether or not to remove charges with zero balances.
10.2 Accept the default 'Zero' (purge) OR use the drop-down list to make an alternate selection.

11. Appointments 
11.1 Use this field to allow the choice of whether or not to remove appointments up until <Through Date>.
11.2 Accept the default 'Yes' (do not remove) OR use the drop-down list to make an alternate selection.

12. When the information is completely entered, select one of these options:

12.1 Click [Exit] to clear the screen and return the focus to the main Intellect screen.
12.2 Click [Clear] to clear all information and return the focus to the <Option> field without saving.
12.3 Click [Print] OR press [Enter] to display a warning message:
12.3.1 Select [Cancel] to return to the Print BOP PURGE screen.
12.3.2 Select [No] to clear all information and return the focus to the <Option> field without saving.
12.3.3 Select [Yes] to display this warning:
[Cancel]: Returns to the Print BOP PURGE screen.
[No]: Clears all information and returns the focus to the <Option> field without saving.
[Yes]: If the <Print Ledger> field is set to 'N,' selecting [Yes] completes the purge.
If the <Print Ledger> field is set to 'Y,' selecting [Yes] displays the Print Ledger dialog box:
Click [Print] (or press [Enter]) to initiate the purge, and a pop-up box displays the status of the purge process:
Clinics getting this error message should contact PCS Support.