OnSTAFF 2000
The following is an example of how Security Groups could be used. You may create four groups only.
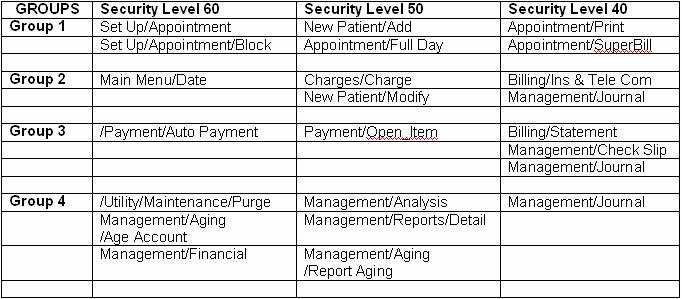
1) Define groupings based on your employee’s daily tasks. For example, the groupings could be defined as follows:
Group 1 Registration and appointment menu options
Group 2 Charge entry, close day, and billing menu options
Group 3 Payment entry and patient statement menu options
Group 4 Management reports, purge, and re-age
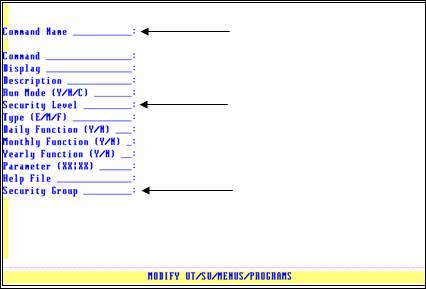
2) Define the appropriate <Security Level> and <Security Group> for each menu option. You will need to refer to ‘Assigning and Setting Security Levels’ found in the Session I Training Documentation, Chapter 3, to obtain the Command Name of each menu option.
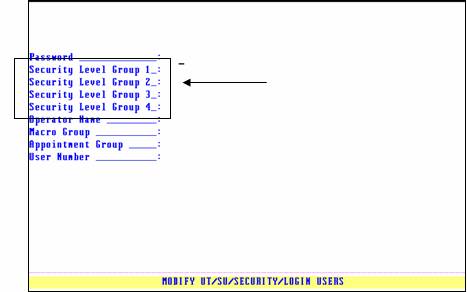
3) Assign the appropriate security level to each user, dependent upon their need for access.
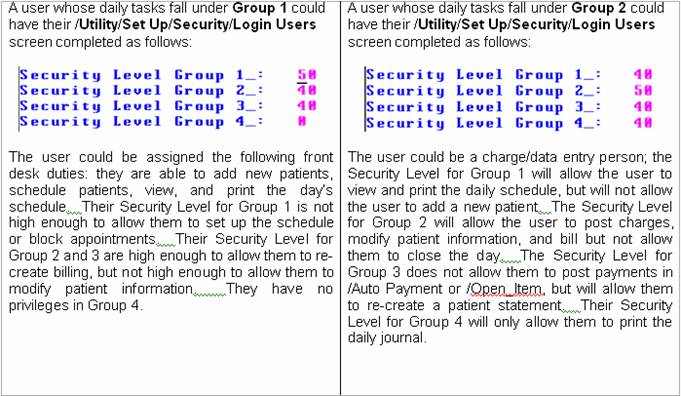
To better illustrate how this affects each user, consider the following employee and grouping set up:
Using the above Grouping Set Up: