
Intellect™
THIRD-PARTY VENDOR OPTIONS

Credit Card Authorization
Credit Card Authorization is used for these features:
• Receipts
• Credit Card Payments via Telemedicine
• Online Payment Portal - Available for Intellect-only clients with Authorize.net
• Patient Payments via Patient Portal - Only available for PCM users with Authorize.net
In this Topic Hide
There are currently two third-party vendors working with Prime Clinical Systems in regard to Credit Card Authorization:
Offices should complete set up for the vendor they use.
Effective version 17.09.13, Authorize.net made state-mandated requirements to their payment system (see information in blue below). Offices using patient portal who have patients making payments via the patient portal automatically received n update. This change took affect on 9/18/2017. Please be sure to verify that payments are going through when using Authorize.net.
IMPORTANT TLS DISABLEMENT NOTICE Schedule --►Appointment --►Receipts -- Authorize.net
As offices may be aware, recent PCI DSS requirements state that all payment systems must disable early TLS by 2018. Transport Layer Security (TLS), is a technology used to encrypt sensitive information sent via the Internet. TLS is the replacement for Secure Sockets Layer (SSL).
In preparation for this requirement, Authorize.Net plans to disable TLS 1.0 and TLS 1.1 on the following date:
Sandbox: COMPLETE
Production: September 18, 2017
The changes have been applied to Intellect for the ENCRYPTION. Offices using Authorize.net either via Intellect or patient portal should contact our support team to schedule an update.
Note: This is a newer version of security. It is transparent to users; i.e., all users have to do is to update their software with the next release version.
This notice was included in the 17.07.21 release notes.
Note: When signing-up for Authorize.net, sign up for a Card Not Present account. It should also be a MOTO set up (see step 5.4). This account is not set up in TEST mode.
Sign up for Authorize.net as follows.
Note: Because Authorize.net periodically changes their website, screen shots in this documentation may vary from Authorize.net's actual screens. For help with Authorize.net's screens, please contact Authorize.net directly.
1. Go to www.authorize.net
2. Click on 
3. Click on  , select a plan, and click on
4. Fill in the form and click on  to create a merchant account. Authorize.net assigns a Payment Gateway ID. This is your account number. It is used to get back into Authorize.net and when contacting Authorize.net.
5. Activate your account through the Authorize.net website.
Once your account is activated, Authorize.net generates an API Login, which is like a user name, and a Transaction Key, which is equivalent to a password. Both the API Login and Transaction Key need to be entered on Intellect screens as part of the set up process, as directed in steps 5.5 - 5.8 below.
To find your API Login and Transaction Key:
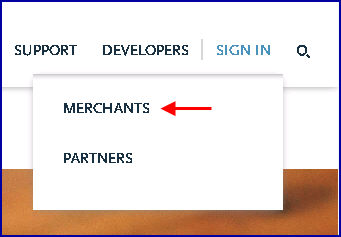
5.1 Go to authorize.net, place your mouse on the SIGN IN option to display the drop-down menu, and click on Merchants:
5.2 Enter your login ID and password where indicated, and press [Log In]:
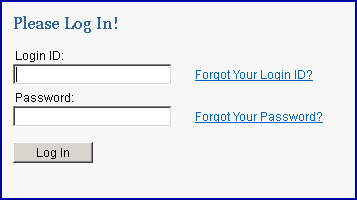
Your account opens.
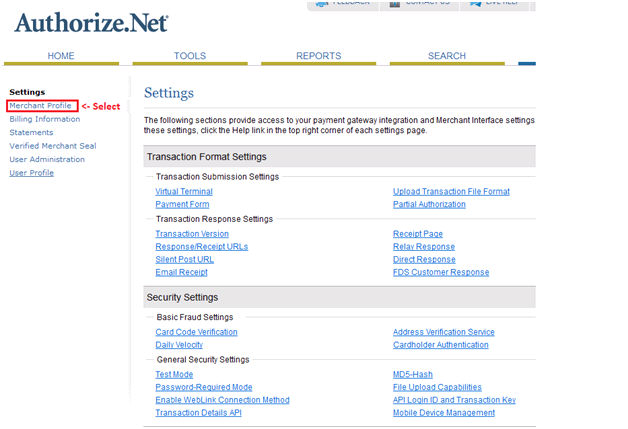
5.3 On the Settings page, select Merchant Profile:
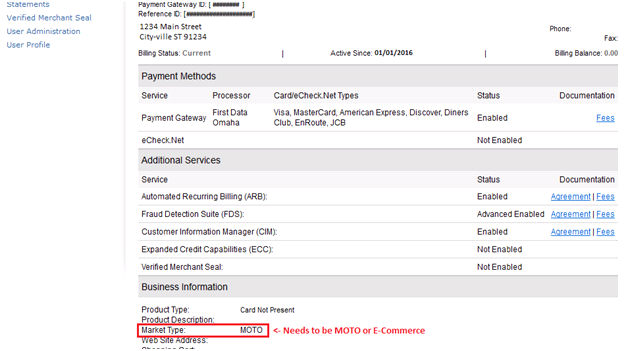
5.4 Verify that the Market Type is set to MOTO (E-Commerce):
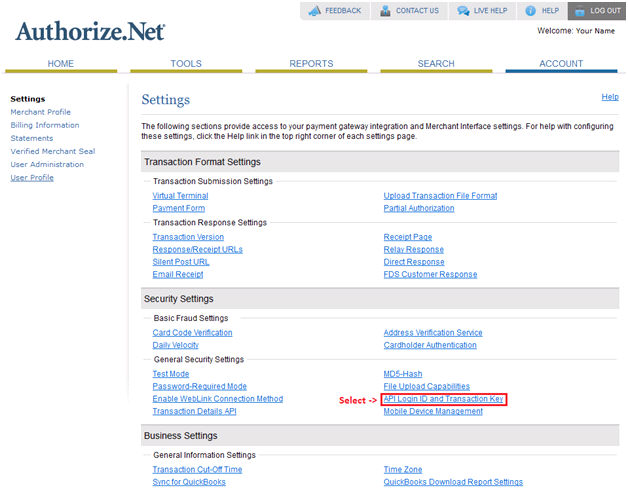
5.5 Go back to the previous Settings page and click on 'API Login ID and Transaction Key':
The API Login ID and Transaction Key page displays:

5.6 The API Login ID on this page (see red arrow above) is a combination of alpha numeric characters. It must be copy/pasted into the <Credit Card API Login ID> field on the Utility --►Set Up --►Clinic screen when registering a clinic, OR on the Utility --►Provider --►Provider screen when registering a provider in Intellect.
5.7 After copy/pasting the API Login ID into the <Credit Card API Login ID> field, click ☐ Disable Old Transaction Key(s) (above the [Submit] button) and then click the [Submit] button (see green arrow above). After entering your Secret Answer to the security question, the Transaction Key screen displays:

5.8 The Transaction Key is equivalent to a password and is a combination of alpha numeric characters. It is the API certification used to connect to the site and should be written down. It must be copy/pasted into the <Credit Card Transaction Key> field on the Utility --►Set Up --►Clinic screen when registering a clinic, and on the Utility --►Provider --►Provider screen when registering a provider in Intellect.
6. On the Utility --►Set Up --►Clinic screen:
• Select https://secure.authorize.net/gateway/transact.dll (as of 1/30/2018) in the <Credit Card Authorization URL> field.
• Enter FALSE in the <Credit Card Test Mode> field.
7. Filters may be set on your Authorize.net account. This is done on the Authorize.net website under Tools --► Fraud Detection --►Enhanced AVS handling filter. The filter should be 'enabled.' This turns off the filter that looks for the addresses on credit card accounts. Per Authorize.net, this is not a required field and, if these values are submitted, there may be additional costs passed on to you through the Merchant you are using to process these transactions. Prime Clinical is not currently submitting this information.
Effective version 18.08.31 - New credit card authorization vendor.
1. Go to www.firstdata.com to set up a Payeezy account.
2. When setting up an account, First Data provides you with an 'api key,' an 'api secrete,' and a 'token.' This information needs to be entered in the fields indicated below on either the Utility --►Set Up --►Clinic (when registering a clinic) OR the Utility --►Provider --►Provider screen (when registering a provider):
<Credit Card Authorization Login>: Enter the 'api key.'
<Credit Card Authorization Password>: Enter the 'api secrete.'
<Credit Card Authorization Token>: Enter the 'token.'
3. Effective version 18.08.31, please note the following on the Utility --►Set Up --►Clinic screen:
3.1 The <Credit Card Authorization URL> field has changed from a text field to a drop-down list field. The user has to select the appropriate URL based on the company it wants to work with; i.e., authorize.net or Payeezy.
3.2 The <Credit Card Test Mode> field is only used when working with authorize.net and does not have any effect when dealing with Payeezy.
Once Authorize.net or Payeezy has been set up as noted in the set up procedure above, credit card information may be entered for individual patients. See Registration --►Credit Card for credit card set up information.
Note 1: At this time Prime Clinical only processes credit card charges and does not process refunds.
Note2: The current CC STRIPE card Reader (Hewlett Packard Magnetic Stripe Card Reader, part number FK186AT) is compatible with both Authorize.net and Payeezy. For more information on using magnetic stripe card readers with credit cards, refer to Magnetic Stripe Card Reader.