Intellect™
PAYMENT MENU OPTIONS

Auto Payment
Write-Off Balance
Effective version 16.02.22, this menu option is used to select the responsible payer for whom the total balance should be written-off.
Note1: Users with a balance forward should NOT use this feature.
Note2: If your office is sending Worker Compensation claims electronically, please let PCS Support know before using this feature.
Video Available: Click Payment Auto Payment Write Off Balance to access the link. Depending on the system set up, the media player may need to be activated. Speakers need to be attached to the workstation to hear the instructions.
Note: To view the videos, log-in through the www.primeclinical.com website. Current support is required.
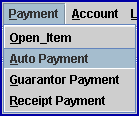
1. To use write-off balances from prior years, go to Payment --► Auto Payment

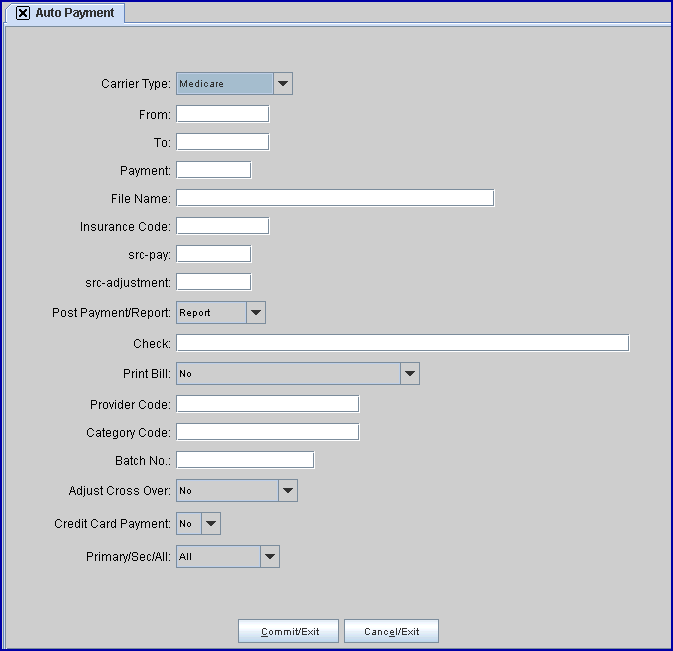
The Auto Payment screen displays:

2.1 Use the drop-down list to select 'Write off charges' (in versions prior to 16.10.11, this was 'W').
2.1.1 In software prior to version 16.02.22, when 'W' was selected, all outstanding balances in the date range for the specified insurance were written off, regardless of the responsible payer.
3. From 
3.1 Enter the beginning date of service for the write-off date range, such as 01/01/2017.
4. To 
4.1 Enter the ending date of service for the write-off date range, such as 12/31/2017.
5. Payment 
5.1 Leave blank for this option.
6. File Name 
6.1 Leave blank for this option.
7. Insurance Code 
7.1 Leave this field blank to write off balances for charges associated with ALL insurances.
7.2 To write off balances associated with a specific insurance, enter the Utility --►Insurance --►Insurance <Insurance Co. Code> of the applicable insurance.
7.3 To write-off balances associated with more than one insurance, use a comma and no spaces to separate each Utility --► Insurance --► Insurance <Insurance Co. Code>.
8. src pay 
8.1 Enter the appropriate Utility --► Messages --► Remark <Remark Code> for a write-off.
9. src adjustment 
9.1 Enter the appropriate Utility --► Messages --► Remark <Remark Code> for a write-off.
10. Post Payment/Report 
10.1 Select ‘Pay & Report’ to write-off the balances and generate a report.
10.2 NOTE: Selecting ‘Report’ allows the user to preview the write-off without applying the adjustments.
11. Check 
11.1 Leave blank for this option.
12. Print Bill 
12.1 Leave default 'No.'
13. Provider Code 
13.1 Leave blank to write-off balances for charges associated with ALL providers.
13.2 To write-off balances associated with a specific provider, enter the Utility --► Provider --► Provider <Provider Code> for the appropriate provider.
13.3 To write-off balances associated with more than one provider, use a comma and no spaces to separate each Utility --►Provider --► Provider <Provider Code>.
14. Category Code 
14.1 Leave blank to write-off balances for charges associated with ALL category codes.
14.2 To write-off balances associated with a specific category, enter the Utility --► Category <Category Code> for the appropriate category.
14.3 To write-off balances associated with more than one category, use a comma and no spaces to separate each Utility --►Category <Category Code>.
15. Batch No 
15.1 Enter a unique batch number.
16. Adjust Cross Over 
16.1 Select 'Yes.'
17. Credit Card Payment 
17.1 Leave default 'No.'
18. Primary/Sec/All 
18.1 Use the drop-down list to select the responsible payer for whom the total balance should be written-off. For example:
18.2.1 Selecting 'P1 Primary 1' only writes off balances within the date range for the specified Insurance Code, Provider Code, and/or Category Code where the <Who> field is set to 'P1' as the responsible payer.
18.2.2 Selecting 'All' writes off all balances with the date range for the specified Insurance Code, Provider Code, and/or Category Code regardless of the responsible payer.
19. When the information is completely entered, select one of these options:

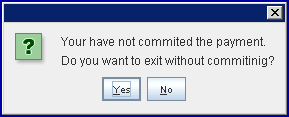
19.1 Click [Cancel/Exit] to display this prompt:

19.1.1 Click [No] to commit and exit.
19.1.2 Click [Yes] to exit without committing.
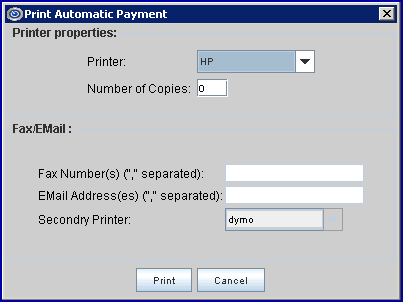
19.2 Click [Commit/Exit] to display the Print Automatic Payment dialog box:

19.2.1 Printer Properties:
19.2.1.1 Printer: The default printer for the logged-in clinic and password is selected. To select a different printer, either click on the arrow, OR press the → (right arrow) on the keyboard to view the list of printer codes. The above is just an example of a printer name and may or may not be set up on the system.
To select the printer type, click on the code, OR use the ↑ (up) and ↓ (down) arrows to highlight the correct code, and then press the [Enter] key to select.
19.2.1.2 Number of Copies: This field defaults to either 0 (zero) or 1. Both print 1 copy. To print more than one copy, enter the number of copies.
19.2.2 Fax/Email:
In addition to printing reports, Intellect provides the capability to export reports to an Excel spreadsheet, Email, Fax, Disk, or Archive. A secondary printer may also be selected, if one is set up, by clicking on the arrow to display the drop-down list.
19.2.3 Select the [Print] button to send the request to the printer (or as a Fax or email).
19.2.4 Select the [Cancel] button to clear the screen and return to the Payment --► Auto Payment screen without saving or printing.