
Intellect™
UTILITY MENU OPTIONS

Set Up
PCM Documents
For PCM users only, effective version 14.07.11, this screen allows the selection of the types of PCM documents to attach to billing via the <Identification Code> field on the Charges --►Encounter screen. See sample scenario.
To be included in the <Identification Code> field, set up for Intellect must be completed (see below), and this PCM document criteria must be met:
· The document must exist in PCM Tabs for the date of service
· The document must be signed/completed by authorized personnel; e.g., Doctor, PA
· The document type must be set to ‘Y’ on this Modify PCMDocuments screen (see details in Intellect Set Up below).
Note: Anything that may already be in the <Identification Code> field remains there; new documents are appended to the end. If the system finds a duplicate file, only one copy of the file displays in the <Identification Code> field.
1. To indicate the types of PCM documents to be selected in Intellect, go to Utility --► Set Up --► PCM Documents:
The Modify PCMDocuments screen opens. For example:
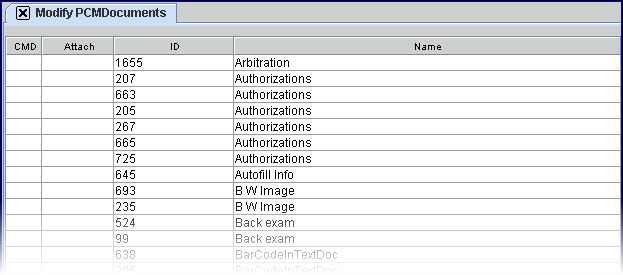
1.1 For offices that have PCM, the types of documents set up in PCM display on this screen, as shown above. Document types correlate to tabs, such as Billing, X-Ray, Progress Report, etc.
1.2 Screen column descriptions:
1.2.1 <CMD>: To select the PCM document types, enter ‘M,’ and tab to the <Attach> column. Note: Document types may not be added to this screen.
1.2.2 <Attach>: Type ‘Y’ in this column for any/all PCM document types to attach to electronic billing (via the <Identification Code> field on the Charges --► Encounter screen).
1.2.3 <ID>: This is a read-only field displaying the PCM document type identification.
1.2.4 <Name>: This is a read-only field which displays the description of the document type.
2. After indicating the desired types of PCM documents by entering ‘Y’ in the <Attach> column, additional set up is required in Intellect:
2.1 Go to Utility --►Set Up --►Parameter --►Modify
These fields must be set up before the Charges --►Encounter <Identification Code> field can be auto-filled:
2.1.1 
• Select ‘Y’ to attach the latest encounter to a charge.
• Select ‘N’ to not attach an encounter to a charge.
• Select ‘X’ to cause Intellect to add an encounter to an imported charge. Effective version 14.07.11 – New option.
2.1.2 
Effective version 14.07.11 – New field.
This field enables Intellect to check for documents for a charge. Enter the number (e.g., 30) of days in which the office would like to look back at the charges based on the Date of Service going forward to any future dates of service. For example, if a doctor does not complete a document on the day of the patient’s July 1 visit, Intellect checks 30 days (June 1) back from the service date to all future dates of service for an encounter attached to the charge.
Note: Adding a number in this field activates the program (this is NOT retroactive). Removing the number immediately deactivates this function.
Once set up is completed, the following sample scenario (in event order) can take place for PCM documents meeting the established criteria.
1. A patient visits the doctor and there is a charge (either entered manually or imported).
2. An encounter is attached to the charge. This could happen two ways:
2.1 The encounter could be added manually.
2.2 The encounter could be added automatically for an imported charge, if the <Attach Encounter> field is set to ‘X.’
3. Intellect searches .pdf files saved in PCM Tab documents whose type has been set to ‘Y’ on this Modify PCMDocuments screen.
3.1 Files of completed documents with a type set to ‘Y’ are autofilled in the <Identification Code> field on the Normalges --►Encounter screen.