
Intellect™
BILLING MENU OPTIONS

Follow Up
Batch of Patients
This menu option is used to print individual or small batches of follow up letters for Insurance billing or for patients' accounts. Very often a client's follow up is set for automation.
An instructional video is available. Click Billing Follow Up Letters to access the link. Depending on the system set up, the media player may need to be activated. Speakers need to be attached to the workstation to hear the instructions.
Note: To view the videos, log-in through the www.primeclinical.com website. Current support is required.
Effective version 18.12.07: The Organization Name and Physical Address may now print on either itemized or non-itemized follow up letters. Contact Support and request that ‘DR_PHYSICAL_ADDRESS and DR_PHYSICAL_CITY_STATE’ be added to Report Designer. See sample letter.
Effective version 18.02.27: The fields that apply to Workers Compensation information (when used) may now be added to the Print Batch of Follow Up Letters and Print Group of Follow Up Letters screens. Information for these fields is pulled from the patients' Registration --►Worker --►Worker Insurance screen. The fields that may be added are:
<DOI> Date of Injury (INS_FIRST_DOI)
<DOI_CT> Date of Injury Continuing Trauma (INS_FIRST_DOI_CT)
<Claim No. 1> (INS_FIRST_CLAIM)
<ADJ Number> (INS_FIRST_WCAB)
<Adjuster> (INS_ADJUSTER)
<Adjuster Phone> (INS_ADJUSTER_PHONE)
<Adjuster Fax> (INS_ADJUSTER_FAX)
<Adjuster Email> (INS_ADJUSTER_EMAIL)
Note: The addition of these options is not automatic. Clinics must request to have them added to the Print Batch of Follow Up Letters and Print Group of Follow Up Letters screens.
1. To request a batch of follow up letters to print in Intellect, go to Billing --► Follow Up --► Itemized --► Batch of Patients
The Print Batch of Follow Up Letters screen displays:
Effective Version 9.12.10 Field Modification. The one- and two-character code choices on the drop-down lists have been replaced with explanatory choices, making the code selection more user-friendly and comprehensive.
Note: The drop-down list descriptions for the code choices have remained the same, allowing correlation between the old and new code choices.
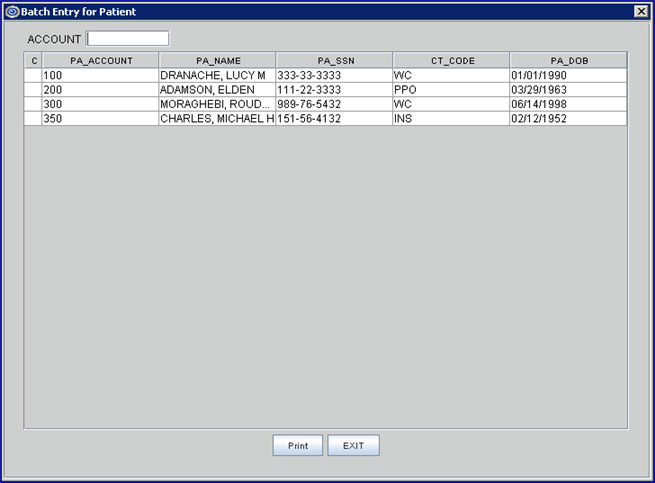
2.1 Type the patient account number for a follow up letter
2.2 Press [Enter] to display the Batch Entry dialog screen, allowing more accounts to be individually added to process as a single batch.
2.3 Type any additional account numbers (one at a time) and press [Enter] to add.
3. From Date 
3.1 Enter the beginning date of the date range for charges to be included in a Follow Up Letter based on the <Date Selection> field selection.
4. To Date 
4.1 Enter the latest date of the date range for charges to be included in a Follow Up Letter based on the <Date Selection> field selection.
5. Bill Code 
5.1 Leave blank (the default) to submit billing for all billing codes.
5.2 To filter the letters based on specific billing codes, enter the Ledger --►Open Item or Ledger --►Accounting [Message] code.
6. Letter Code 
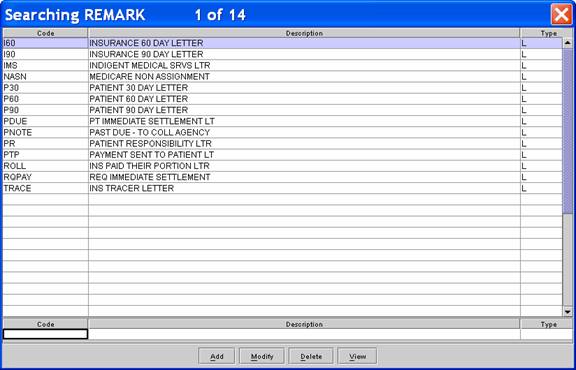
6.1 Enter the Utility --►Messages --►Remark <Remark Code> for the letter to be printed.
(Code matches the Utility --►Message <Message Code> which attaches the message to the body of the letter).
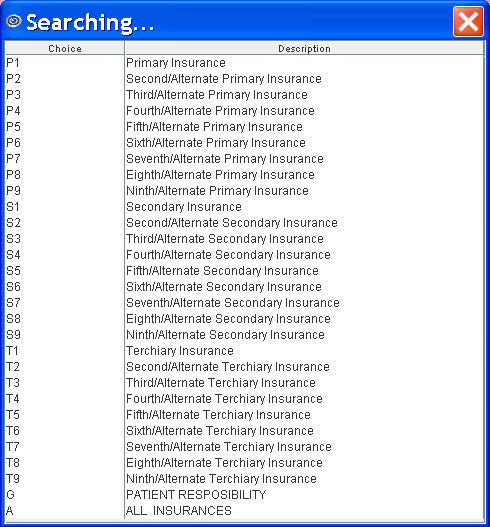
6.2 To view the list of codes with descriptions, press the [F2] key. To select, double-click on the correct code, OR use the ↑ (up) and ↓ (down) arrows to highlight the correct code, and then press the [Enter] key to select. A sample list follows -- clinic screens may vary based on the system set up.
6.3 See the end section of this document for sample letters.
6.4 The field is mandatory and must be completed. If left blank, an error message displays:
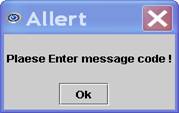 .
.
6.5 Effective version 17.12.20, when a Follow Up Letter is requested, additional information displays on the Follow Up letters when a patient has a date of injury (DOI):

The information is pulled from the system as follows:
• If the patient was registered under Registration --►Worker and an Insurance exists, the <DOI> (and any additional existing DOI) on the Insurance screen print.
• If the patient is registered under Registration --►Regular and an Encounter screen is populated with an <Injury Date> and the <Encounter #> is attached to the charge, the <Injury Date> on the Encounter screen prints.
7. Category 
7.1 This field limits the letter results by specific patient category.
7.2 Press [Enter] to bypass this field and request ALL categories, OR use a specific category by typing its' Utility --► Category <Category Code>.
7.3 To view the list of codes with descriptions press the [F2] key. To select, double-click on the correct code, OR use the ↑ (up) and ↓ (down) arrows to highlight the correct code, and then press the [Enter] key to select.
8. Insurance Type 
8.1 This field is used to determine which insurance type (Who) to include.
8.2 Accept the 'P1 Primary 1' default (formerly P1) for this group of patients OR use the drop-down list to make an alternate selection.
8.3 Click on the field, OR press the [F2] key to display the valid choices.
To view the list of only the codes, click on the arrow. To select, click on the correct code, OR use the ↑ (up) and ↓ (down) arrows to highlight the correct code and then press the [Enter] key to select.
Effective version 9.12.10
All versions prior to 9.12.10
9. Patient/Insurance 
9.1 Indicate whether this letter should be sent to the patient (Patient Letter) or the insurance company (Insurance Letter).
9.2 Patient Letter (formerly P) is the default.
9.3 Intellect changes the address header based on this selection. Examples below are for the same account.
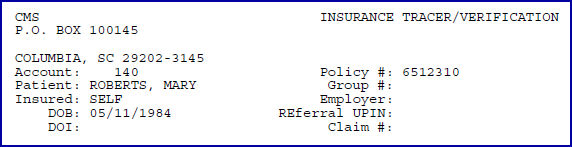
Patient Letter option:

10. Insurance Code 
10.1 Limits the selection by specific patient insurance companies.
10.2 Press [Enter] to bypass this field and request ALL insurance companies, OR select a specific insurance by typing its' Utilty --►Insurance <Insurance Co. Code>.
10.3 This field accepts multiple values:
• separated by commas with no spaces:

• an asterisk * to return all Insurers starting with the portion of the code entered prior to the *. For example, M* prints all Insurers whose code begins with M.

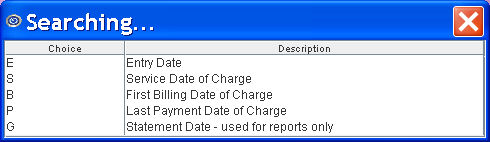
11.1 Accept the 'Entry Date' default (formerly E) OR use the drop-down to make an alternate selection.
11.2 Click on the field, OR press the [F2] key to display the valid choices.
To view the list of only the codes, click on the arrow. To select, click on the correct code, OR use the ↑ (up) and ↓ (down) arrows to highlight the correct code and then press the [Enter] key to select.
Effective version 9.12.10

All versions prior to 9.12.10
12. Include Diagnosis 
12.1 Accept the 'Include Diagnosis' default (formerly Y) OR use the drop-down list to select 'Do Not Include Diagnosis' (formerly N).
13. Itemized/Non Itemized 
13.1 Accept the 'Itemized' default (formerly Y) OR use the drop-down list to select 'NonItemized' (formerly N).
13.2 Click on the field, OR press the [F2] key to display the valid choices.
To view the list of only the codes, click on the arrow. To select, click on the correct code, OR use the ↑ (up) and ↓ (down) arrows to highlight the correct code and then press the [Enter] key to select.
Effective version 9.12.10

13.3 Using Itemized includes an itemized list of charges to the account.
![]()
13.4 Non-itemized contains only the body of the message. It is not recommended to send a non-itemized letter to an insurance company.
14. When the information is completely entered, select one of these options:

14.1 Select the [Print] button OR press [Enter] to display the printer dialog box:
14.1.1 Printer Properties:
14.1.1.1 Printer: The default printer for the logged-in clinic and password is selected. To select a different printer, either click on the arrow, OR press the → (right arrow) on the keyboard to view the list of printer codes. In our example, the defaulted Printer is HP. This is just an example of a printer name and may or may not be set up on the system.
To select the printer type, click on the code, OR use the ↑ (up) and ↓ (down) arrows to highlight the correct code; then press the [Enter] key to select.
14.1.1.2 Number of Copies: This field defaults to either 0 (zero) or 1. Both print 1 copy. To print more than one copy, enter the number of copies.
14.1.2 Fax/Email:
In addition to printing reports, Intellect provides the capability to export reports to Email, Fax, Disk, or Archive.
NOTE: Non-commercial email carriers have a cap on the number of emails that may be sent per day. If the clinics' current email carrier does not support the number of emails needed to be sent on a daily basis, they need to contract with a commercial email vendor.
A secondary printer may also be selected, if one is set up, by clicking on the arrow to display the drop-down list.
14.1.3 Select the [Print] button to send the request to the printer (or as a Fax or email).
14.1.4 Select the [Cancel] button to clear the screen and return to the <Account> field without saving or printing.
14.2 Click [Clear] to clear all information and return the focus to the <Account> field without saving.
14.3 Click [Exit] to clear the screen and return the focus to the main Intellect screen without saving.

