
Intellect™
UTILITY MENU OPTIONS

Tools
Report Designer
Scanning and Programming Forms in Intellect
Forms scanned and programmed by the client use PDF files when sending the print request to the printer. This means that the form, as well as the data, is sent to the printer, which is slower and requires more memory than if using PRN files. Prime Clinical recommends that workstations printing PDF files have a minimum 256mg ram.
When PCS sets up a form, it is first created in a separate program and saved as a PRN file which is loaded into the database. Using Misc --► Load Forms, the form is loaded to the printer, therefore only the data must be sent when printing the forms.
See required form set up.
Updates:
Effective version 18.12.07, offices who would like the Organization Name and Physical Address to print on either itemized or non-itemized follow-up letters can now do so with a request for Support to add ‘DR_PHYSICAL_ADDRESS and DR_PHYSICAL_CITY_STATE’ to Report Designer. See sample letter.
References to CHDP 6 and CHDP 7 were removed, and CHDP was added to support CHDP 8, the most current version at the time.
Effective version 16.02.22:
1. Offices may include the physical address of the provider on the CHDP form. To have the provider’s physical address print, please contact PCS support.
2. For HCFA reports, Intellect pulls the value from the <Share of Cost Amount> field on the Charges --►Encounter --►Generic screen when it is greater than zero. When entering the dollar value, do not enter decimal points or dollar signs. Enter full dollar and cents amounts, even if the amount is even. For example, $4.00 is entered as 400. Use only one claim line for each service billed.
To facilitate this feature, the <Insurance Type> field must equal D on the Utility --►Insurance screen. Additionally, please contact PCS Support to add the ‘INS_STATUS’ field to Report Designer If it is not already there.
Share of cost amounts are entered in the Claim Codes (Box 10D) and Amount Paid (Box 29) fields of the CMS-1500 claim form.
The following steps must be completed in order:
Step One - Assigning Form Names
Step Two - Printer Capability Set Up
Step Three - Defining/Setting Up Document Types
Step Four - Scanning the Form
Step Five - Opening Report Designer
Step Six - Creating a New Form in Report Designer
Step Seven - Cloning the SQL Table
Step Eight - Completing the Form's Report Properties Screen
Step Nine - Programming the Form
A - Programming Database Fields
D - Adding the Calendar Date on the Form
E - Adding the Appointment Date on the Form
Step Ten - Setting Up the Patient Registration Field Drop Down List (when applicable)
Step Eleven - Setting Up the Provider or Appointment Type Superbill Form (when applicable)
Step One - Assigning Form Names:
There are two types of forms which may be scanned and programmed by clients: Registration and Superbill. When deciding on the name to assign to each form, consider the information below.
1. Registration forms:
1.1 Each clinic can have its' own custom form(s).
1.2 The drop-down list with Registration form names is shared between all clinics – see NOTE 1.
1.3 A separate registration form may be set up for different types of patients, or different languages. For example:
• WC for Worker Compensation registration form
• ENGLISH or ENG REG, or SPANISH or SPN REG for different language registration forms
NOTE 1: For Registration forms: The registration form is assigned to the patient at time of registration. If the identical form and programming are used in more than one clinic, the names do not need to be clinic specific. If they are different, consider this when assigning the form names. The drop-down list for the registration form names is shared between all clinics – therefore, names may need to indicate which clinic they are used in.
2. Superbills:
2.1 Each clinic can have its' own custom form(s).
2.2 Forms may be created for different types of patients or types of appointments. For example:
• WC for Worker Compensation superbills
• SB for general Superbill
• CARD or PED for specific specialties; i.e., Cardiology or Pediatrics
• SURG for Surgery superbills
NOTE 2: For Super Bills: Which Superbill to print is determined by the set up in the Utility --►Set Up --► Appointment --► Appointment Type. The options are to either print the Superbill based on the provider the patient is scheduled to see or by the appointment type. Consider this when assigning the form name.
NOTE 3: For PCM Clients: SuperBill forms generated in Intellect may include a barcode. These forms may be printed in Intellect and then auto-scanned into Patient Chart Manager (PCM) via the barcode. To include a barcode on the Superbill, open the Superbill in Report Designer, select the Bar Code component (from the left side) and place it on the Superbill where it should print, dragging it so the field has enough characters for the barcode. The barcode properties need to look like this:
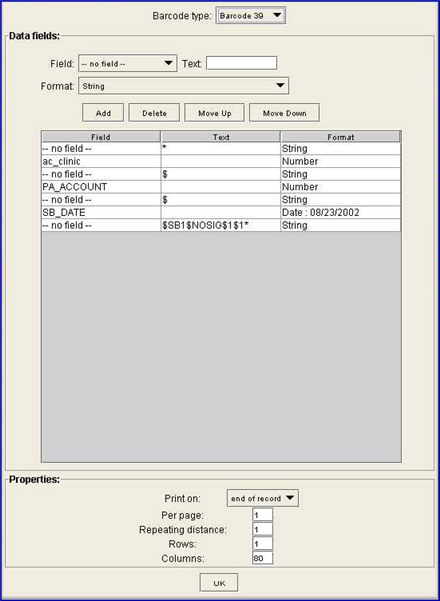
A code also needs to be set up in PCAP for the barcode. This is done in Utility --►Set Up --►Printer --►Capability --►Add <Code> and <Definition>.
For additional information on using Report Designer, see the remainder of this document and Utility --►Tools --►Report Designer --►Writing Custom Reports.
Most of the set up is in Intellect. The only set up in PCM is to have a Fax/Scan doc with a code that matches the form code set up in Intellect for the super bill, which is how PCM determines the doc name and chart tab.
Step Two - Printer Capability Set Up:
This step must be completed before doing step three.
1. To set up printer capabilities in Intellect, go to Utility --►Set Up --►Printer --► Capability --►Add:
The Add PCAP_ENTRY screen opens:
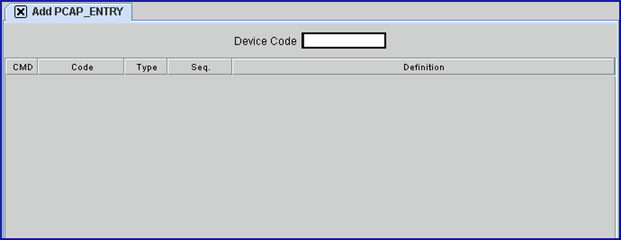
Complete the screen as indicated:
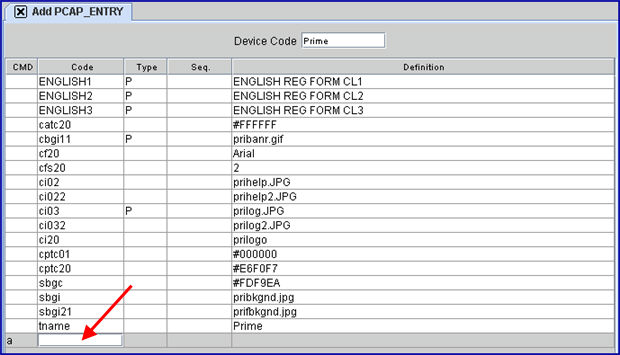
2. Device Code 
2.1 Always type the Device Code as set up for the physical printer (for example: HP, printer, etc.). When setting items for viewing after the physical printer's item is entered, use PDF.
2.2 After typing the code, press [Enter] and the multi-line display appears.
The focus will be in the Code column on the last line in 'Add' mode, as shown below:
3. Code 
3.1 Type the unique code that corresponds to the one in Report Designer (decided in step one).
3.2 This code must be appended by the clinic number.
3.2.1 For example, if the Form Name is ENGLISH and it will be used in clinic 1, type:
ENGLISH1
3.3 Press the [Enter] key.
4. Type 
4.1 For an entry to be active, type 'P.' Otherwise, leave blank.
4.2 Press the [Enter] key.
5. Sequence 
5.1 Not applicable. Press [Enter] to leave blank.
6. Definition 
6.1 Not required, though a brief description of the form may be entered, i.e.: English Registration form to track the form's purpose. After entering a definition, press the [Enter] key to save the record. Do NOT press the [Esc] key, as escape does not save the record.
6.1.1 After completing the record, the line should look similar to this:

6.1.2 The focus is returned to the Code column, ready to enter another record. When finished entering records and the focus is in the Code column, press the [Esc] key. The focus returns to the CMD column.
6.1.3 It is necessary to enter a record for each clinic in which a form is used. For example, if the ENGLISH registration form will be used in clinics 1, 2, and 3, enter a record for ENGLISH1, ENGLISH2, and ENGLISH3 as shown below:

Step Three - Defining/Setting Up Document Types:
The scanner must be set up and the driver must be loaded on the workstation before continuing.
Creating the Document Type is needed so that when a form is scanned into Intellect the scanner settings are defaulted and do not need to be entered each time a form is scanned.
1. To set up a scanner in Intellect, go to Utility --►Set Up --►Printer --►Scanner Settings --►Add:
The Add SCANNER SETTINGS screen opens if a scanner is attached:
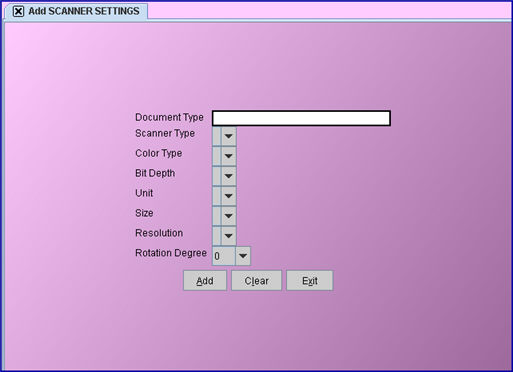
Complete the screen as noted below:
2. Document Type ![]()
2.1 Assign a Document Type code. For example, if scanning a patient insurance card, <Document Type> could be completed with INS CARD, or AUTH for authorization forms, REG for registration forms, SB for Superbill forms, etc.
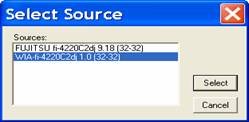
3.1 A drop-down list of the scanner drivers installed on the workstation is available. To select the correct driver from the list, highlight the correct option and press the [Enter] key.
NOTE: If <Document Type> will be used on multiple workstations which have different scanner drivers, define the <Document Type>s for each driver on the workstation where the driver is loaded.
4. Color Type ![]()
4.1 From the drop-down list, select the correct color type for the form(s) being scanned.
4.2 PCS recommends that a black and white form is selected.
5. Bit Depth: ![]()
5.1 This is defaulted for the office, dependent on the <Color Type> selected or the default <Scanner Type>.
6. Size ![]()
6.1 From the drop-down list, select the appropriate page size.
NOTE: If setting up a document type that is not a standard size, select Custom, then click on [Native Settings ] to define the page size.
To select the correct scanner driver from the list, highlight the correct option and click the [Select] button:
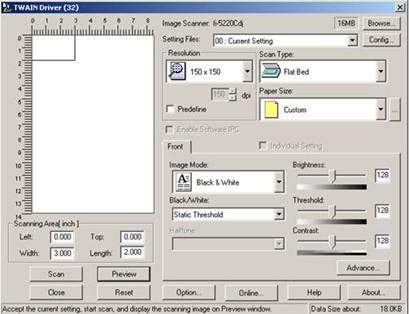
The following is just an example as the screen varies, depending on the <Scanner Type> (driver) being used:
Set Resolution to 150 x 150 or 200 x 200.
Paper Size is determined by the selection.
Set the Width and Length for the form to be scanned.
Scan Type is defaulted, based on the scanner driver.
7. Resolution ![]()
7.1 PCS recommends that this be set to either 150 x 150 or 200 x 200. The resolution determines the quality of the document scanned. Higher resolution gives a clearer image, but also uses a lot more memory. This may become an issue for offices scanning a large volume of documents. All scanned documents are stored in the database on the server, not the workstation where they are scanned.
8. Rotation Degree ![]()
![]()
8.1 This is usually left at 0 (zero). Depending on the type of scanner being used, custom sized forms may need to be scanned sideways. If this applies to your scanner, set the <Rotation Degree> so that the scanned document is automatically rotated.
8.2 Click on the [Add] button to save the record.
Step Four - Scanning the Form:
Go to Misc --►Scan Forms:
1. Place the form in the scanner, then select [Scan]:
2. Intellect displays the Document Type selection box. The list of scanner drivers set up on the workstation is shown.
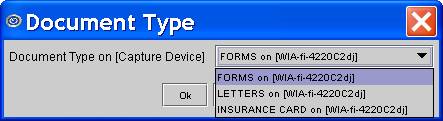
2.1 From the Document Type drop-down list, select the correct document type.
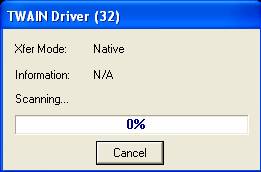
While the form is being scanned, a dialog box displays:
The scanned form displays:
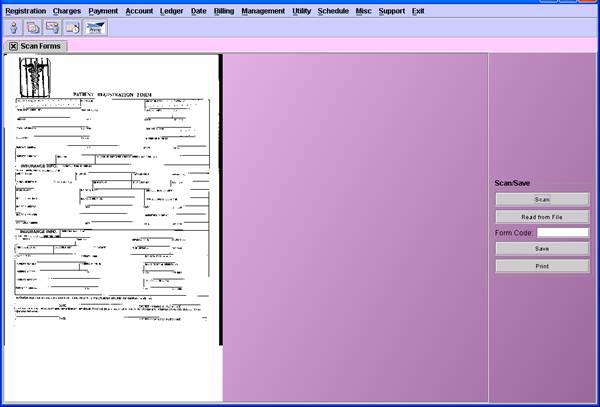
2.2 To save the form, enter the form name with clinic designation in the <Form Code> field, then click on [Save]. In our example, the form name and clinic is ENGLISH1.
NOTE: The quality seen on the screen will not be as good as that which will print. To test the quality of the form, select the [Print] button:
Before continuing to the next step, close the Scan Forms screen. Keeping the Scan Forms screen open at the same time as the Report Designer in the next steps may cause insufficient memory errors.
Step Five - Opening Report Designer:
1. Go to Utility --► Tools --► Report Designer
2. While the program is loading, a dialog box may display:
Step Six - Creating a New Form in Report Designer:
1. To create a new form/report, select the New Report icon:

The Report Properties dialog box displays:
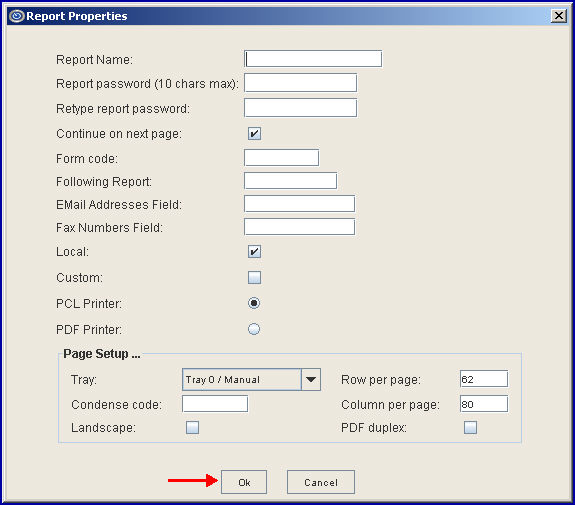
2. Complete these fields:
2.1 <Report Name>: For example, enter AgingReport.
2.2 <Report password (10 chars max)>: For security purposes, each report has its' own password. The password is specific to the report, NOT the user generating the report. The password can be anything; it is not restricted by requiring a capital letter, a symbol, etc.
2.3 <Retype report password>: Re-enter the password that was entered in the <Report password (10 chars max)> field.
Of the remaining fields, some are defaulted and are discussed later in this document.
3. Select [Ok] (see above).
4. Close and save the form by clicking on the Exit icon located on the far right side:

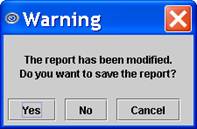
5. When this dialog box displays, select [Yes] to save the form:
Step Seven - Cloning the SQL Table:
1. Click on the Clone Report Template icon:
![]()
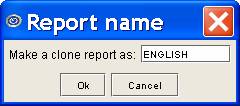
2. When this dialog box displays, enter the name of the template from which to clone (copy) SQL information for the new form and select [Ok].
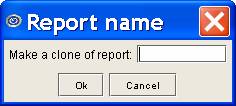
For example, if cloning the registration form template:
• To program registration forms, enter: REG TEMPLATE
• To program Superbills, enter: SB TEMPLATE
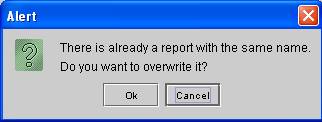
3. When this dialog box displays, enter the Form Name to which the information is being copied and select [Ok]. In our example, the template SQL information is being cloned to the ENGLISH form:
4. If this dialog box displays, select [Ok]:
Step Eight – Completing the Form's Report Properties Screen:
1. Open the form by selecting the Open Report icon:

2. Click on the Report Properties icon:

3. Complete the screen as indicated below:
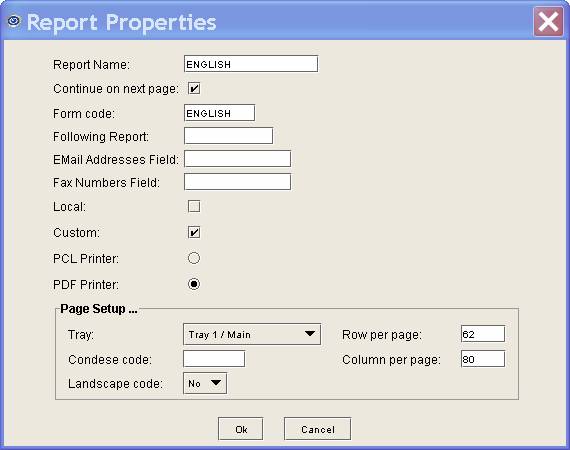
3.1 Report Name
The name of your form should be defaulted. In the example above, it is ENGLISH.
3.2 Continue on next page
Not applicable. This may be left checked or unchecked. This field applies only when creating reports in Report Designer which may continue on to multiple pages.
NOTE: If the form is two or more pages, repeat all the steps and complete the <Following Report> field as described below.
3.3 Form code
Populatewith the Form Name. Do NOT enter the clinic number unless it is part of the Form Name. Combining the clinic number with the form name is needed only in Step Two. In the example above, it is ENGLISH.
3.4 Following Report
This field applies only when the form should follow another form; i.e., a multi-page registration form. Enter the form name of the first page WITHOUT the clinic designation.
3.5 Email Address Field
To ALWAYS have the output of this form emailed, enter the field name from which the email address should be retrieved. To get the field name, go to the field on the screen and press [F1]. For example, if the form should be emailed to the patient, go to Registration --►Regular --►Patient --►Modify, place the focus on the <Email Address> field, and press [F1] to display a dialog box with the field name. In this example, the field name is PA_EMAIL

3.6 Fax Numbers Field
To ALWAYS have the output of this form faxed, enter the field name from which the fax number should be retrieved. Use the instructions in 3.5 above to get the field name.
3.7 Local
The box is defaulted to blank. It designates whether the task should be run on the local workstation or, if left unchecked, to run on the server. Unless otherwise instructed by PCS, leave the default setting of 'blank' so the report runs on the server. If checked ![]() , the report runs on the local workstations.
, the report runs on the local workstations.
3.8 Custom
To NOT have updates overwrite the form, check ![]() this box. In the case of forms scanned and programmed by clients, PCS recommends that this Custom box always be checked.
this box. In the case of forms scanned and programmed by clients, PCS recommends that this Custom box always be checked.
3.9 PCL Printer
As a default, this radio button ![]() is checked. If the forms being programmed are not using PCL, selecting PDF Printer in the next step unchecks this PCL Printer button.
is checked. If the forms being programmed are not using PCL, selecting PDF Printer in the next step unchecks this PCL Printer button.
3.10 PDF Printer
Click on the radio button ![]() to select. In doing so, the PCL Printer radio button above becomes unchecked. Select PDF Printer or the form will not print with the data.
to select. In doing so, the PCL Printer radio button above becomes unchecked. Select PDF Printer or the form will not print with the data.
Page Setup section
3.11 Tray
Intellect usually defaults Tray 1/Main, though this may differ per workstation as it is controlled by the hardware set up/configuration. The tray destination may be changed by selecting one of the options from the drop-down list.
3.12 Condense code
To increase or decrease the size of the font, select the appropriate size code from the Condense Code Table shown below. When creating forms, enter the Condense Code (not the Printer/Capability Code).
• The default for the Condense code field is blank, which is the same as SZ12. Most Intellect portrait style reports use a similar size font.
• The smaller the number the smaller the font.
• The larger the number the larger the font.
• SZa is similar to the font size used on the Financial Report.
The codes as set up in the Utility --►Set Up --►Printer --►Capability table (for Printers) are below:
• The last few characters of each line determine the size of the font.
• Any code can have the size changed by modifying the font size. For example, if cf10 is just a little too small, but cf11 is a little too large, a new code may be added by changing only the font size to a value between cf10 (e.g., 10.25) and cf11 (e.g., 11.25).
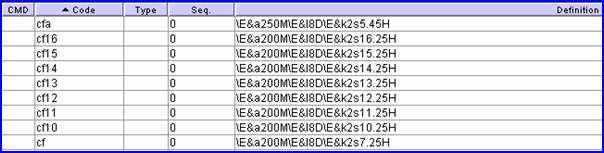
NOTE: PCS does not recommend changing the font size on existing Codes because if the Codes are used on other peoples reports, they will be changed too.
3.13 Landscape code
The default is No for portrait forms. If the scanned form is landscape, change this to Yes.
3.14 Row per page
The default is 62. When creating the form, leave this at 62.This Row per page is usually changed only when creating reports or letters when letterhead is not being loaded.
3.15 Column per page
The default is 80. If using a smaller font than the default, this field may be modified to allow a larger number of columns on the form.
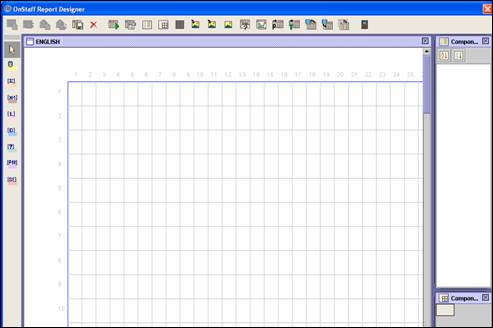
Step Nine - Programming the Form:
With the form opened in Report Designer, the screen should look like the following. Each square on the grid represents one character.
For software versions prior to 13.08.20, to view the scanned form over the grid, select the Load Background Image from Database icon:

As of version 13.08.20, the ‘Load Background Image from Database’ button at the top of Report Designer immediately brings up the loaded background image, regardless of whether it has been scanned as a .tiff file, or has been imported as a .prn. As a result, it is no longer necessary to use a .jpg file to bring up the form in Report Designer.
Note: In bringing up the background image, Report Designer first looks for the image ending with the current clinic number, and, if it is not found, it then looks for one without a clinic number. If Report Designer is still unable to find the image, a message displays stating there is no such a record, and requests that the path be entered to its’ .jpg file.
Additionally, the 'Load Background Image from File' button was eliminated in version 13.08.20 for simplicity.
Programming is done in five areas:
A - Programming Database Fields
D - Adding the Calendar Date on the Form
E - Adding the Appointment Date on the Form
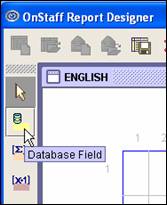
A - Programming Database Fields:
1. Select the Database Field icon, located on the left side of the screen:
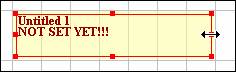
2. Click on the square within the grid where the data should start to print. A yellow box is placed in the square:

3. Click on the yellow square and hover over the dot on the right side, click again and hold. Drag the yellow box to the length needed to print. Remember that each square in the grid represents one character.
4. Double-click in the yellow area of the field.
• When using a software version prior to 13.06.24, go to step 4.1.
• When using software version 13.06.24 or greater, go to step 4.2.
4.1 After double-clicking on the yellow area, versions prior to 13.06.24 display this window:
With the Data Source Tab highlighted, use the <Field> drop-down list to select the field from which to print:
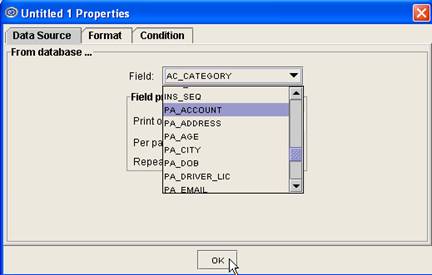
Go to step 4.3.
4.2 After double-clicking on the yellow area, version 13.06.24 and greater displays the window shown in 4.2.1.
Effective version 13.06.24, programming data fields within Report Designer was made more user-friendly with changes to the <Field> field on the Data Source tab. In the past, <Field> had a drop-down list (see step 4.1 above). As of version 13.06.24, <Field> has a tree which categorizes available choices using table groups and field names for ease of selection and accuracy.
With the Data Source Tab selected (highlighted), view the table groups and field names in <Field> Properties as indicated:
4.2.1 When using the SQL Editor, the table groups, with field names within each group, are automatically created when the SQL is created by using the SQL Editor. Click on the table folder to display the list of fields available in the SQL, as shown in the example below.
4.2.2 When writing the SQL from scratch, assign an alias* for both the table and the field; i.e., select Account.ac_account AcctNo, Account.ac_name PatientName, Account.ac_category PatientCategory from acct_bal Account.
NOTE: Do NOT leave spaces between words within an alias*. For example, Acct No must be entered as AcctNo or Acct_No. If there is a space between, the field name displayed will be No.
* For additional information on aliases, refer to Report Designer --►Writing Custom Reports – Step 5 - Field Aliases Tab.
If an alias is not assigned to both the tables and fields, the Properties Datasource <Field> displays as shown:
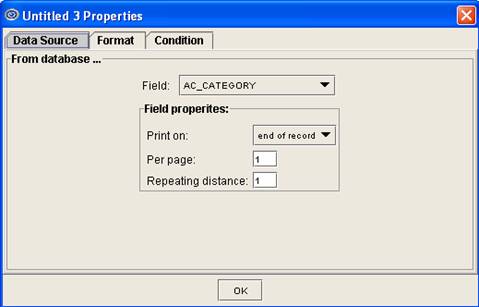
4.3 Click on the Format tab. This displays:
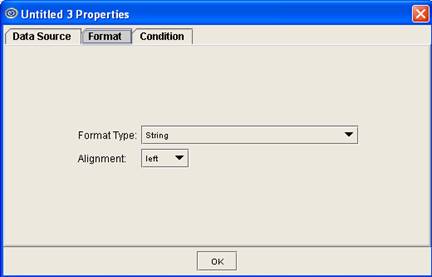
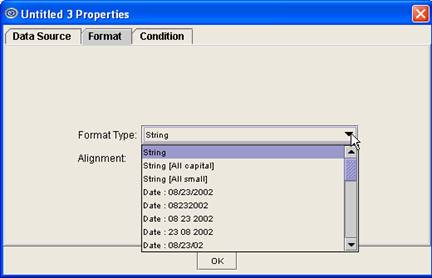
4.3.1 Format Type
Select the correct formatting from the drop-down list. This setting needs to be changed only when selecting a date or currency field. All others may be left at the default: String.
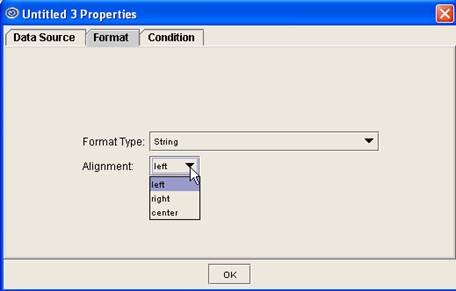
4.3.2 Alignment
Select whether to have the data aligned to the left, the right, or centered.
4.4 The Condition tab usually is not applicable to forms.
Click on [Ok] to save.
Continue this step until all the fields to print on the form are completed.
NOTE: The fields available to print on the registration or Superbill forms were copied to the new form during step 6. Most are self explanatory - but these rules should help for those which are not:
~ Items starting with wo are for work information.
~ Items starting with ic are for the current insurance.
~ Fields defined with a 1 in the name are used when printing the current primary
insurance information, a 2 in the name is for the current secondary insurance.
B - Using the Report Key Icon: 
The Report Key icon at the top of the screen is used when it is required to have data pull from the database table, and to add information on the screen. The type of information needed determines what is selected through the Report Key.
Click on the Report Key icon to display this screen, as of version 13.07.08:
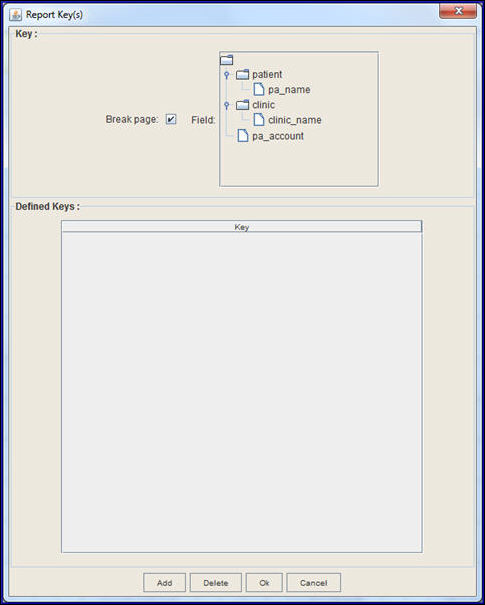
The database tables and fields shown in the <Field> table correlate to field names on Intellect's screens.
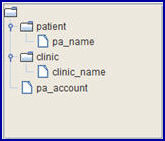
This example displays the patient and clinic database tables with applicable fields:
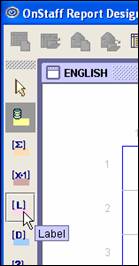
C - Adding Labels to the Form:
To have a label print which is not part of the form, select the Label icon, located on the left side of the screen:
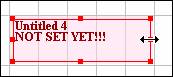
1. Click on the square within the grid where the label should start to print. A pink box is placed in the square:

2. Click on the yellow square and hover over the dot on the right side, click again and hold. Drag the pink box to the length needed to print. Remember that each square in the grid represents one character.
3. Double-click in the pink area of the field to display this window:
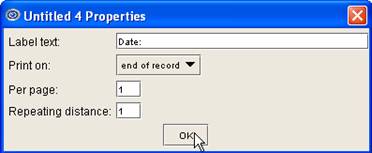
Complete as indicated:
3.1 Label text
Enter the text for the label. For example: Date:
3.2 Print on
When programming forms, leave the default end of record. This is usually used when programming reports.
3.3 Per page
When programming forms, leave the default of 1.
3.4 Repeating distance
When programming forms, leave the default of 1.
Continue this step until all the labels to print on the form are completed.
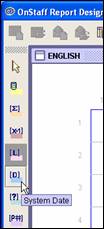
D - Adding the Calendar Date on the Form:
To print the calendar date, click on the System Date icon, located on the left side of the screen:
1. Click on the square within the grid where the date should start printing. A blue box is placed in the square:

2. Click on the blue square and hover over the dot on the right side, click again and hold. Drag the blue box to the length needed to print. Remember that each square in the grid represents one character.

3. Double-click in the blue area of the field to display this window:
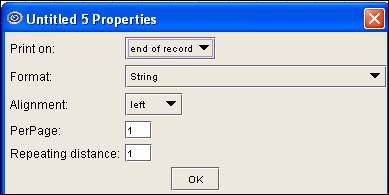
Complete as indicated:
3.1 Print On
When programming forms, leave the default end of record. This is usually used when programming reports.
3.2 Format
Select the date format from the drop-down list.
3.3 Alignment
Select whether to have the date aligned to the left, the right, or centered in the space allotted.
3.4 Per page
When programming forms, leave the default of 1.
3.5 Repeating distance
When programming forms, leave the default of 1.
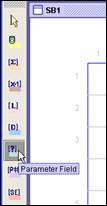
E - Adding the Appointment Date on the Form:
To print the appointment date, click on the Parameter Field icon, located on the left side of the screen:
1. Click on the square within the grid where the date should start printing. A green box is placed in the square:
:
2. Click on the green square and hover over the dot on the right side, click again and hold. Drag the green box to the length needed to print. Remember: each square in the grid represents one character.
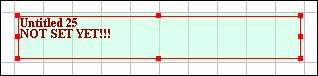
3. Double-click in the green area of the field to display this window:
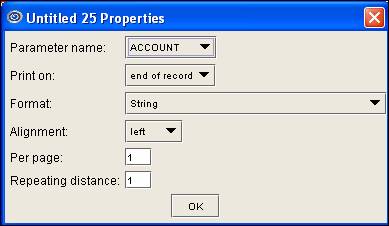
Complete as indicated:
3.1 Parameter name
Select the SB_DATE parameter from the drop-down list.
3.2 Print On
When programming forms, leave the default end of record. This is usually used when programming reports.
3.3 Format
Select the date format from the drop-down list.
3.4 Alignment
Select whether to have the date aligned to the left, the right, or centered in the space allotted.
3.5 Per page
When programming forms, leave the default of 1.
3.6 Repeating distance
When programming forms, leave the default of 1.
Step Ten - Setting Up the Patient Registration Field Drop Down List (when applicable):
This step is necessary only when setting up registration forms. Remember when entering records in this multi-row table that it is shared between clinics.
1. Go to Utility --►Set Up --►Field Choices --►Modify.
2. At the <Field Name> field, type PA_REGIST_FORM to display a FIELD_CHOICES screen. For example:

Note: The data on each system may be different than what is shown, depending on the set up date of the database and whether or not registration forms have already been set up on the system.
Complete the screen as indicated:
2.1 CMD
These commands may be entered in the CMD column:
A To add new form names. This creates a new line item in the table
M To modify existing information
D To delete a line from the table
2.2 Custom (Y/N)
Y (Yes): Indicates this record has been customized. Do not overwrite with updates.
N (No): Indicates this record has NOT been customized. Ok to overwrite with new options during updates.
2.3 LN
This is a system-generated number. The focus does not stop in this column.
2.4 Field Value
Enter the form name. Do NOT enter the name with clinic number.
2.5 Description
Enter a brief description of the form.
Step Eleven - Setting Up the Provider or Appointment Type Superbill Form (when applicable):
This step is necessary only when setting up superbills.
1. To set up the Superbill printing options, go to Utility --►Set Up --►Appointment --►Appointment Type --►Modify.
2. At the <Superbill (Y/N/X)> field, click on the field OR press the [F2] key for the list of options:

2.1 If Superbills are printed based on the appointment type scheduled:
2.1.1 Set this field to Y
2.1.2 Enter the Superbill form name:
• Superbill File (Super)
• Superbill Form (PRN)
2.2 If Superbills are printed based on the provider the patient is scheduled to see:
2.2.1 Set this field to N
2.2.2 Go to Utility --►Provider --►Modify and enter the Superbill form name:
• Super Bill File (Super)
• Super Bill Type (SB)