
Intellect™
UTILITY MENU OPTIONS

Set Up
Maintenance
Import Data
and
Maintenance
Import Data
or
MISC MENU OPTIONS
Import Data
This option allow importing bulk data from a file to create records in Utility --► Procedure --► Fee Schedule or Utility --► Diagnosis --► Diagnosis. The Import Data screen can be configured to accept several file types and formats. Several conditions must exist and/or be set prior to the import, as noted below.
Effective version 13.04.10, the Import Data screen is capable of using Excel files. However, only .xls files may be used. If there is a need to use an .xlsx file, open the .xlsx file using Excel and save the file in the older .xls format.
For a Fee Schedule:
Fee Schedules define the charge and approved amounts associated with a specific CPT, Provider and Insurance code, as well as date of service range. NOTE: The Pay Plan Code populated on the patient’s Primary Insurance screen determines which fee schedule value is used when the charge is posted.
• At minimum, the file to be imported must contain the procedure code (CPT/HCPCS), insurance approved amount and charge amount, if NOT billing the approved amount.
o NOTE 1: It is recommended to save the file as csv (comma delimited) format with the amounts as numbers only and no dollar sign ($).
o NOTE 2: The file must be saved to a directory/folder that can be accessed from within Intellect. For example: If connecting to the remote/hosted server, the file must be saved on the server, not the local workstation.
• The fee schedule must be loaded for the codes associated with the <Insurance Code> and <Provider Code> fields populated on an existing Utility --► Insurance --► Pay Plan --► Pay Plan screen.
o NOTE: If the <Provider Code> is left blank on the Pay Plan screen, the fee schedule must be added separately for EACH provider. This allows importing different fee schedules if approved amounts vary by provider based on contracted vs. non-contracted rates or specialty.
• The CPT code must exist on a Utility --► Procedure --► Procedure screen for any procedure to be added/modified to the Fee Schedule table.
• When a match is found in Utility --► Procedure --► Fee Schedule for the same Provider Code/Insurance/CPT combination, a new record is inserted into the table ONLY IF a match is NOT found for the same From/To Date range. Existing records are updated ONLY IF an exact match is found for the same From/To Date.
• The Import Data feature is NOT clinic-specific. This means that if the Import Data program is run in Clinic 1, and the same <Provider Code> and <Insurance Code> combination exists in a Procedure Fee Schedule in Clinic 2, it also needs to be updated in Clinic 2.
Saving The File: For offices with an existing fee schedule, the fee schedule being downloading is saved in the /home/staff/download folder. If no prior fee schedule is found, the program downloads the fee schedule to the users default folder /home/staff/documents/.
1. To import data in Intellect, go to Utility --► Maintenance --► Import Data:
The Import box opens:
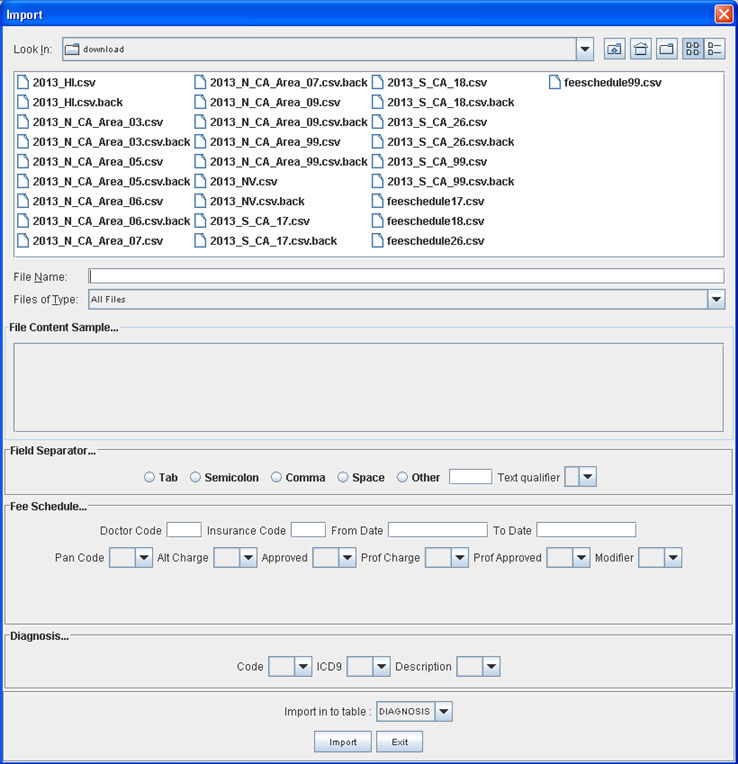

2.1 Effective version 13.03.01, 'download' is the default directory.
2.2 Use the drop-down arrow ![]() to change directories, if necessary.
to change directories, if necessary.
2.3 To select the file that contains the data, click once on it, and then press [Enter].
![]()
3.1 The file selected in the <Look In> field is displayed here.
4. Files of Type:
![]()
4.1 Use the default 'All Files' option to load all types of files, OR use the drop-down arrow ![]() to select the appropriate file type.
to select the appropriate file type.
4.2 The example in the <File Name> field above shows a .CSV file type (feeschedule17.csv) which may be loaded using the default 'All Files' option.
5. File Content Sample ...

5.1 Effective version 13.03.01. To display sample text for the file selected in the <Look In> field, press the [Enter] key in the <File Name> field above.
5.2 The contents of the file are displayed in column A until a text delimiter is selected in the <Field Separator> section (see below). In the example above, a text delimiter was not yet selected, so all of the information in feeschedule17.csv selected in the <File Name> field is shown in column A.

After the text delimiter is selected in the <Field Separator> section, Intellect formats the text into columns if the text contains the selected delimiter. If the text does not contain the chosen delimiter, the contents of the file are displayed in column A.
6.1 Select the field separator (a.k.a. text delimiter) which matches the file format.
6.2 The text delimiter is used to format the text into columns.
6.2.1 For example, in the <File Content Sample> field, the contents of the feeschedule17.csv file initially display in column A. Since feeschedule17.csv is a comma separated value, click on the Comma text delimiter ![]() to format the file into columns. The figure below shows the feeschedule17.csv file formatted based on commas.
to format the file into columns. The figure below shows the feeschedule17.csv file formatted based on commas.

6.2.2 If ![]() or
or ![]() were selected for a .csv file, and there were no tabs or semicolons in the text, Intellect simply displays the contents of the .csv file in column A.
were selected for a .csv file, and there were no tabs or semicolons in the text, Intellect simply displays the contents of the .csv file in column A.
6.4 Other ![]()
To have the text in the file formatted by a delimiter other than Tab, Semicolon, Comma, or Space, enter the character to use for formatting in the <Other> field, and then press [Enter]. Any character may be entered.
If necessary, select the appropriate qualifier; e.g., double quotes, single quotes, or none.
7. Fee Schedule ... (prior to version 13.12.12: 'Approval Field Chooser ... ')
This section must be completed to import a fee schedule and does not apply when importing diagnosis codes.

7.1 Doctor Code ![]()
7.1.1 Type the Utility --► Provider --► Provider <Provider Code> for whom this fee schedule is being uploaded.
7.1.1.1 If the same fee schedule is used for all providers, this field must match the <Provider Code> field on the Utility --► Insurance --► Pay Plan --► Pay Plan screen.
7.1.1.2 If the providers each have a different fee schedule, enter the <Provider Code> for the applicable provider.
7.1.2 This is mandatory for fee schedules.
7.2 Insurance Code ![]()
7.2.1 Type the Utility --►Insurance --►Insurance <Insurance Co. Code> associated with the provider for whom this fee schedule is being uploaded. Note: This <Insurance Code> field must match the <Insurance Code> field on the Utility --►Insurance --►Pay Plan --►Pay Plan screen.
7.2.2 This is mandatory for fee schedules.
7.3 From Date ![]()
7.3.1 Effective version 9.12.35 - New field
7.3.2 Enter the starting date of service for which the fee schedule applies. For example: 01/01/2020.
7.3.3 This field should not be left blank.
7.4 To Date ![]()
7.4.1 Effective version 9.12.35 - New field
7.4.2 Enter the ending date of service for which the fee schedule applies. For example: 12/31/2020.
7.4.3 This field should not be left blank.
7.5 Pan Code ![]()
7.5.1 Use the drop-down to select the column which contains the panel codes on the data sheet for fee schedules.
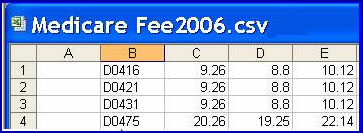
In the example below, the Utility --► Procedure --► Procedure <Panel Code> is shown in column B so #2 would be selected for the <Pan Code> field.
7.5.2 The system cross-references the CPT codes with panel codes and inserts the fee schedule.
7.5.3 This panel code must match corresponding codes in Intellect’s database as added in Utility --► Procedure --► Procedure <Panel Code>.
7.6 Alt Charge ![]()
7.6.1 Use the drop-down to select the column which contains alternate charge values on the data sheet for fee schedules, if desired.
7.6.2 Complete this field ONLY if there is a desire to replace the Fee Schedule <Alt Charge> with a value from the data sheet.
7.6.3 NOTE: If the <Alt Charge> field is left blank on this screen, then no data populates in the Alt Charge column on the in Utility --► Procedure --► Fee Schedule screen and the charge amount must be manually updated for all line items. If the <Alt Charge> field is left blank on the Fee Schedule screen, then the charge amount defaults to -0- (zero) when posting charges.
7.7 Approved ![]()
7.7.1 If desired, use the drop-down to select the column which contains approved charge values on the data sheet if this is for fee schedules.
7.8 Prof Charge ![]()
7.8.1 Use the drop-down to select the column which contains desired values on the data sheet for fee schedules.
7.9 Professional Approved ![]()
7.9.1 Use the drop-down to select the column which contains desired values on the data sheet for fee schedules.
7.10 Modifier ![]()
7.10.1 Use the drop-down to select the column which contains desired values on the data sheet for fee schedules.
8. Diagnosis ... (prior to version 13.12.12: 'Diagnosis Field Chooser…')
8.1 This section is used for updating the Utility Diagnosis table and does not apply to importing the fee schedule.


9.1 For a fee schedule, use the drop-down to select 'Approval'.
9.2 For diagnosis, accept the default 'Diagnosis'.
9.3 Click on the [Import] button to begin the import process.
9.4 The Import Process… window displays while the file is being imported to the Fee Schedule, giving a running total of the records inserted and records updated:
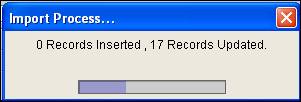
When the import task is completed, a pop-up displays indicating the number of records in the file, records updated, and records inserted:
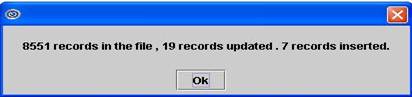
Press the [Space Bar] to continue.
To review new fee schedule changes or updated information, go to Utility --►Procedure --►Fee Schedule. For additional fee schedule information, click here.